Weekend Drop -














When the floor clears, read the next attack shape and select the matching protection prayer. Recover stolen health and avoid reflected attacks before attempting two-tick weapon cycles. Bring melee and ranged options, and agree on tank order, the starting quadrant and shared brazier use before entering.
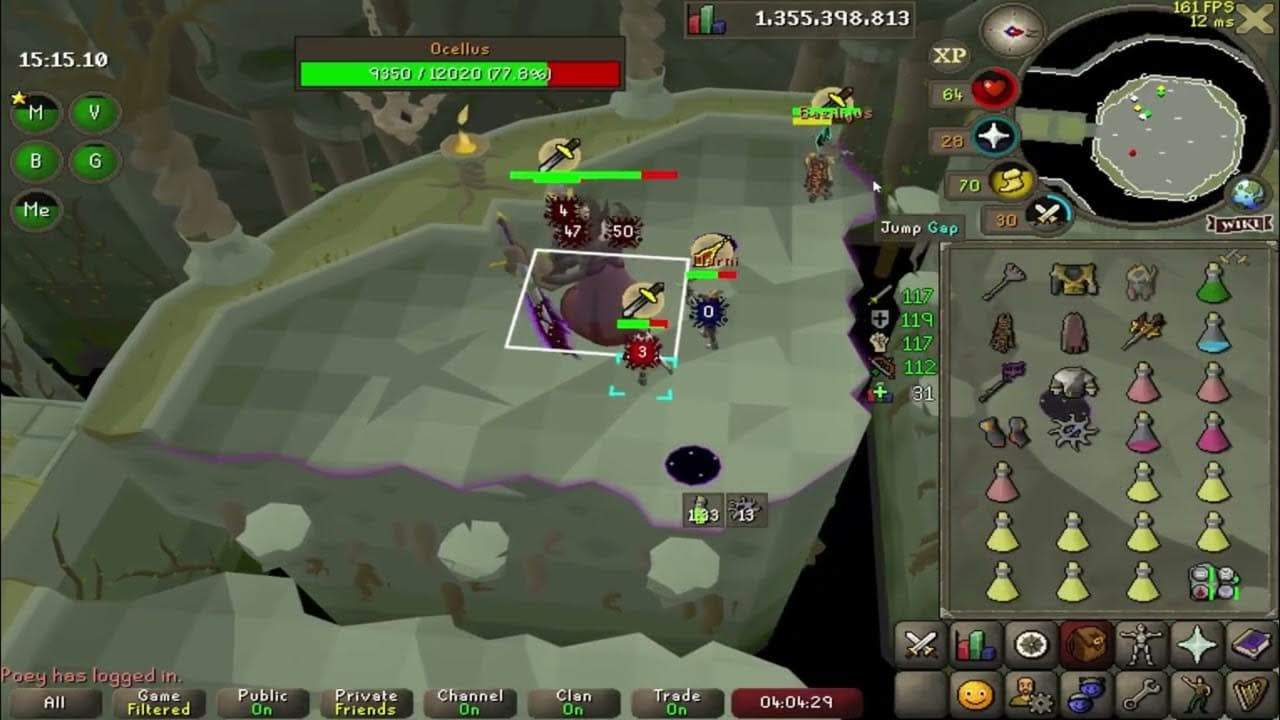
Ocellus Mechanics at a Glance
Phase | Main Threat | First-Clear Response |
P1 | Projectiles, vines and a finishing blast | Match prayer to colour, block vines and retreat |
P2 | Portal waves and quadrant-wide damage | Find the orange intersection, then use the ground portal |
P3 | Tank slams, prayer parries and collapsing quadrants | Dodge every third basic attack and prepare each crossing |
P4 | Health drain, Void explosions and reflection prayers | Recover the orb, move continuously and switch styles |
The Fractured Archive's final encounter changes rhythm several times. P3 means the first three shattered quadrants here; P4 means the last surviving quadrant. If your group already reaches P4 reliably, concentrate practice on its ranged-to-melee cycle and prayer signals.
P1: Prayers and Vine Timing
Read the Projectile Colours
In OSRS, use Protect from Magic against blue projectiles and Protect from Missiles against orange or red projectiles. Follow the attack rather than leaving one prayer active throughout Ocellus's movement between corners.
Block the Seven Corner Vines
At a corner, stand on each active vine to interrupt the energy reaching Ocellus. Wait for its green flash, then move onto the next vine. Leaving too early misses the block; lingering after it resolves delays your next movement. Missed blocks let the boss recover and make the sequence more dangerous.
Count seven vines. After the last one, retreat away from Ocellus beyond the nearby blast area; the early-clear method uses a two-tile retreat from the final vine position. Do not step back toward him for an extra hit as the sequence ends.
Retreat after the Center Pair
In the middle, Ocellus sends vines in pairs. Block the first, move onto the second after the flash, then immediately retreat for the slam. The second vine gives you less time to react than the corner sequence.
For learning, skip an attack whenever it would delay that retreat. Predictive movement can recover damage later, but mistiming the second block repeatedly wastes far more supplies than a missed weapon swing.
Prepare for Annihilation
After the center vines, "Embrace... Annihilation..." warns of a heavy magic volley. Missed blocks leave more charge in his meter. Use Protect from Magic and heal beforehand; high charge can still be lethal. Blocking enough vines may instead produce "Death... awaits..." and substantially less damage, a useful sign your timing is working. Prayer alone cannot compensate for poor vine blocks.
P2: Orange Portals and Safe Tiles
Find the Orange Intersection
Pick a starting quadrant together before P1 ends. If your team leaves supplies on the floor, use that same agreed quadrant so players do not separate during the transition.
Find the two orange portals among the purple ones. Their horizontal and vertical lanes intersect in a safe 2-by-2 area. Move into that intersection for the wave, then identify the next orange pair before choosing your next destination. A tile that worked for one pattern does not remain safe for every pattern.
Use the Ground Portal
Later, the portals turn purple and dangerous patches appear. Dodge those patches until an orange portal appears on the ground, then step onto it to avoid the quadrant-wide attack and transfer onward. Repeat the sequence until the phase ends.
For an OSRS Raids 4 first clear, use visible safe zones. Leave precise wave-skipping methods for later; mistiming them can expose you to consecutive waves.
P3: Tanking, Parries and Crossings
Protect Twice, Dodge the Third
In this part of The Fractured Archive, Ocellus's tank protects against two melee attacks, then moves out of the third attack's ground path. Prayer alone cannot solve that third hit. Keep a clear movement lane, and let the next tank establish position after each crossing. Early clears report tank selection following party order, starting with the second member; confirm who actually receives attacks.
Non-tanks should initially stack near the outer edge to place the opening dark hazards together. Avoid spreading them through the tank's working space.
Time the Melee Parry
Keep Protect from Melee active before the parry sequence begins. Use this player-reported visual sequence:
Melee protection ON → 0 hitsplat on you → OFF → shadow chakram beneath Ocellus → ON.
For each additional spin, manually switch protection off again, then back on at the next chakram cue.
A successful parry does not automatically switch prayer off. Move off falling rubble between repeats. If you miss, follow the next cue instead of rapidly toggling. Keep effects audible while learning.
Handle Specials before Damage
When Ocellus rises for the magic sequence, use Protect from Magic and avoid the pink ground markers. For its finishing blast, shelter underneath him, then leave before the stomp lands. The rumble fading and floor outline reaching peak brightness are early-clear exit cues; waiting for the visible landing is late.
Attack a teammate's binding vine promptly so they can dodge again. Clear Void creatures before they finish charging.
Among your OSRS Items, keep a ranged weapon ready for most Void creatures. Early-clear testing also reports Earth Blast for blue Void Augmenters that resist ranged; assign a standard-spellbook player if using that method.
During Insolence, move away from each targeted ground strike; crossing residual cracks is preferable to taking the direct slam if trapped.
Leave before the Quadrant Breaks
When Ocellus begins destroying a quadrant, find the ledge that connects to the stepping stones and cross to the next platform immediately. Use the actual ledge opening to choose the route. Falling during a late or incorrect crossing is fatal, regardless of your protection prayer.
P4: Healing Orbs and Safe Damage
Read the Floor before Attacking
Ocellus P4 starts when only one quadrant remains. He alternates between an airborne state with safe outer tiles and a grounded state that forces you close. Each state combines a health drain with repeated explosions beneath your position. A prayer attack separates those movement sequences.
At each change, identify safe ground and check Ocellus's overhead before attacking. Clicking him with the previous weapon can pull you onto dangerous floor or send a hit into his reflection prayer. For your first cycle, learn the orb location and explosion sequence; add attacks once you can follow both.
Locate and Recover Your Orb
The blue, wind-like attack removes half your current Hitpoints. A light-blue healing orb appears on safe ground and charges toward a larger heal. Locate it during charging and approach through the safe area, aiming to collect it fully charged before it disappears.
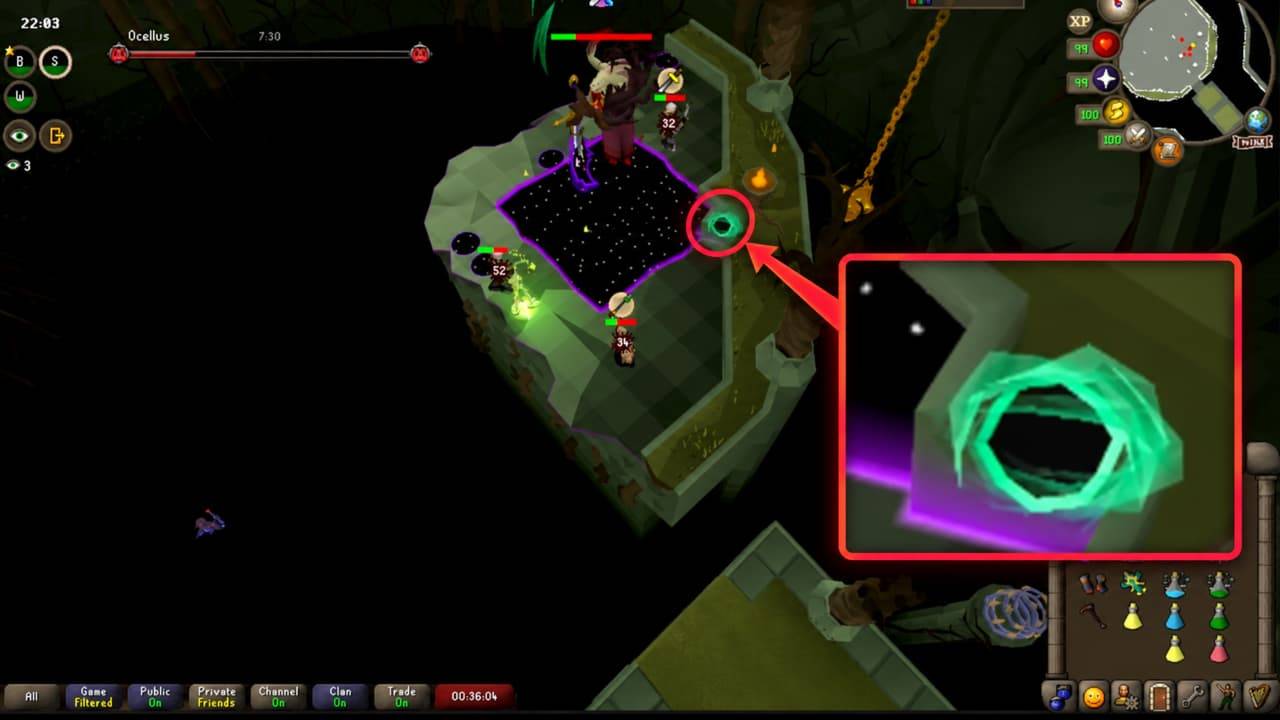
At 80 Hitpoints, that drain leaves 40 before any other damage. In this OSRS encounter, your orb is personal: follow the one on your screen. A teammate's orb location does not identify your destination.
Early clears show a brief collection opportunity after the floor returns to normal. Treat that as the end of your window, rather than the moment to start searching. Looking opposite your entry position can help you locate the orb, but its actual spawn determines your route.
The orb restores health taken by the drain. Explosion or missed-prayer damage can still leave a deficit afterward. If the orb expires, use supplies as needed and prepare for the next drain; continuing to chase its old position cannot recover it.
Follow the Six-Explosion Rhythm
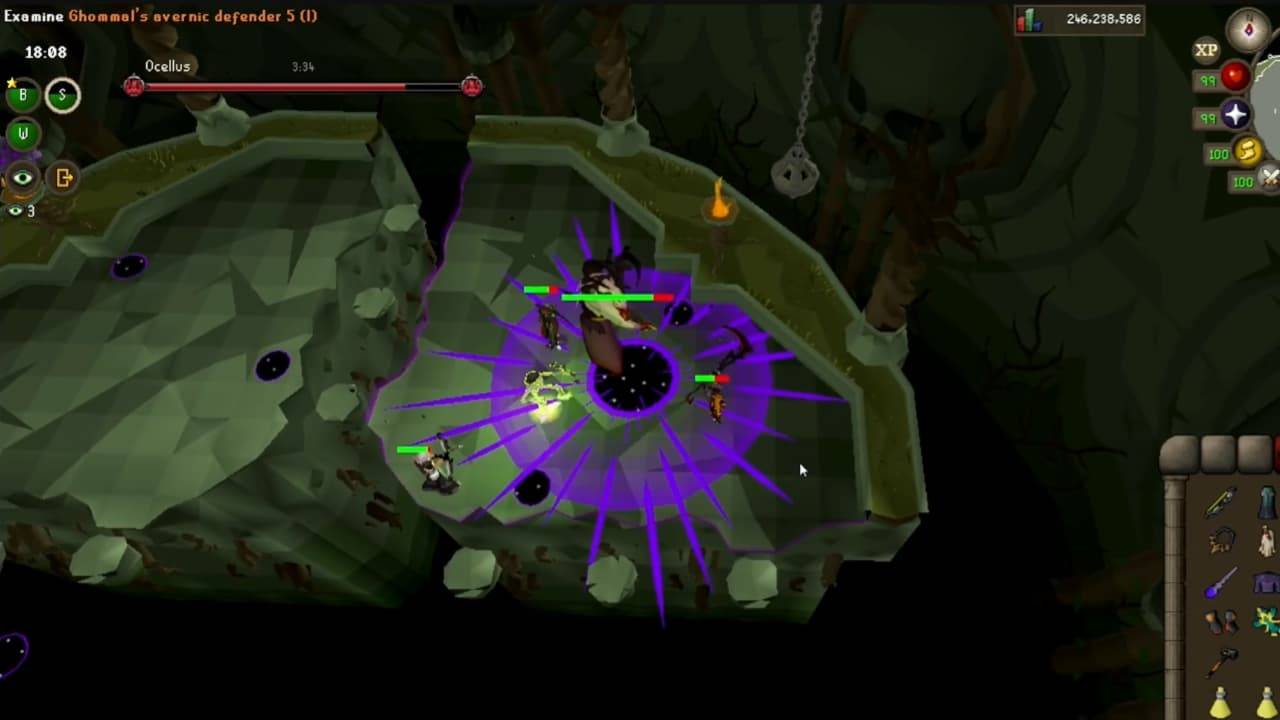
Purple particles circling your character warn that the sequence is starting. A new explosion marks your current tile every 2 ticks, damages that tile on the next tick, and repeats 6 times per sequence. Move off each marked tile before its damage resolves.
The relative timing below starts at the first tile mark, not when you enter P4 or first notice particles. It explains the hazard timing; it does not require a particular marked-tile route.
Explosion | Tile Marked | Damage Resolves |
1 | Tick 0 | Tick 1 |
2 | Tick 2 | Tick 3 |
3 | Tick 4 | Tick 5 |
4 | Tick 6 | Tick 7 |
5 | Tick 8 | Tick 9 |
6 | Tick 10 | Tick 11 |
Your first job is to leave the marked tile during each one-tick delay. Keep using short movements inside safe ground, and avoid stepping back onto a position whose blast has not resolved. Your explosions are personal; another player's movement does not establish your own timing.
Count six marks if that helps track the sequence, but wait for the final blast to resolve before treating it as finished. A premature stop after the sixth mark can still take the sixth hit. Then prepare for the prayer attack as the floor clears.
Switch with His Reflection Prayer
Ocellus's overhead determines your attack style. Your own protection prayer answers the incoming attack at the end of the movement sequence. Keep those two checks separate.
Ocellus State | His Overhead | Your Attack Style |
Airborne, nearby floor covered by Void | Deflect Melee | Ranged from safe outer tiles |
Grounded, outer floor covered by Void | Deflect Ranged | Melee from safe inner tiles |
Wrong-style attacks can reflect damage onto you, which is especially dangerous after the health drain. During a switch, confirm both the safe floor and your equipped weapon before sending another attack.
In the ranged section, move between shots on the outer safe tiles. For melee, wait until the inner tiles become safe, then move within reach. An attack click may move your character toward Ocellus, so check that approach instead of assuming the weapon switch alone makes the attack safe.
Recognize the Three Prayer Signals
After the explosions, Ocellus changes to Soul Split and sends a quadrant-wide attack. Identify its shape and select the matching protection prayer.
Attack Shape | Correct Prayer |
Cogwheel or toothed gear | Protect from Melee |
Glowing circle or magical pulse | Protect from Magic |
Pointed arrows or spikes | Protect from Missiles |
In P4, activate the matching prayer as soon as you identify the cue. You can protect in advance; the earlier P3 prayer-off/parry timing does not apply here.
The ranged arrows are distinct. Compare the toothed edge of melee's wheel with magic's rounded pulse, using sound as a second cue. Finish the movement sequence with your prayer controls ready so inventory switching does not hide the selection you need.
Add Two-Tick Attacks Later
Two-tick damage is optional for a first clear, even with high-end OSRS Items. Practice it only after you can collect the orb and protect against the finishing attack. The explosion's two-tick marking cycle and accelerated weapon attacks are separate mechanics: knowing the first does not automatically synchronize the second.
The early-clear method enters the rhythm from the purple particles: move, attack, then move again. Once synchronized, alternate movement and attack commands on successive ticks, giving an attack opportunity every two ticks during the explosion window. An attack click still needs a movement click afterward; holding your position for the next swing can leave you on a marked tile.
If the rhythm breaks, stop sending attack commands and re-establish dodges from the visible explosions. Early-clear advice describes re-entering with an attack after a visible blast, followed immediately by movement. Attempt that recovery only when you can still identify the next safe step; low health is a reason to keep dodging and heal.
Practice one attack between movements before trying to maintain accelerated damage for the whole sequence. If that attack delays your next step or causes an explosion hit, remove it on the next cycle. You can finish the encounter using fewer attack opportunities while learning.
Use a simple progression across attempts: first complete all six dodges and recover the orb, then add one attack without taking an explosion hit, then extend the attack sequence. If a new attack causes damage, return to the previous step until that movement is comfortable. Check the finishing prayer separately: surviving the explosions but missing that protection means your next practice target is recognizing the shape. Faster clicking alone will not fix a prayer selection error at the end of the sequence.
Recover from Specific Mistakes
What Went Wrong | Immediate Response |
An attack click leaves you standing in a mark | Move to clear safe ground; skip the next attack |
The sixth mark appears and you stop early | Keep moving until its delayed blast resolves |
Your orb expires before collection | Heal as needed and locate the next orb during charging |
A hit reflects after the floor changes | Stop attacking and correct your weapon against the overhead |
On later cycles, assigned players must also destroy Void Rifts before they charge. Check the next safe step before attacking a rift, then return attention to your own explosion timing. When the floor clears, answer the prayer signal and prepare the opposite attack style for the next half-cycle.
Gear, Braziers and the Hotfix
Choose a Learning or Damage Setup
Goal | Practical Setup | When to Use It |
First clear | Abyssal bludgeon with your melee armour, plus a dragon crossbow with optional Ruby dragon bolts (e) and a ranged armour switch | Keep switches manageable and leave room for brews and restores |
Faster clears | Scythe of Vitur or Obligator, plus a twisted bow and more complete offensive switches | Add gear once you consistently collect orbs and dodge all six explosions |
The OSRS Items listed here are setup examples, not a full BiS ranking or a minimum equipment requirement. Match off-hands to your weapon; ruby bolt procs cost health. Assign Tonalztics of Ralos or elder-maul defence reduction to named teammates, then reserve later energy for damage once the cap is reached.
Coordinate the Four Braziers
The corner braziers, also called censers, provide shared, single-use team effects. Saradomin supplies healing; Bandos empowers a melee hit; Armadyl empowers a ranged hit; Zaros restores special-attack energy. Call activation before clicking. Save healing for meaningful team damage and coordinate offensive effects with the intended attacks. Confirm that teammates have their weapons ready before spending an offensive effect.
Respect the Defence Floor
The October 21 hotfix leaves Ocellus at a minimum of 60% of base Defence: a maximum reduction of 40%. His P3 reduction now persists across quadrant changes. Reach the floor in the first quadrant, then use later special energy for damage. The Blade in P2 is a separate uncapped target. Avoid carrying opening-day zero-Defence equipment assumptions into every phase of OSRS Raids 4.
Common Mistakes and Fixes
Problem | Next-Attempt Adjustment |
Orb disappears before collection | Locate it during charging and approach before the floor clears |
Prayer seems correct but damage continues | Check for explosions, unsafe floor or reflected attacks |
Repeated P3 parry failures | Turn prayer off between spins and use one consistent cue |
Damage appears after a weapon switch | Check Ocellus's overhead before your next attack |
Tank has nowhere to dodge | Place opening hazards at the edge and leave their lane clear |
Jagex's OSRS hotfix addressed incorrect final-phase starting positions. If behaviour appears abnormal, record the floor, overhead and orb; a missed collection alone does not establish a bug.
First-Clear Checklist
While regrouping for another attempt at The Fractured Archive, check these assignments and movement cues:
Agree on the starting quadrant, tank sequence and defence-reduction players.
Keep melee, ranged and all three protection prayers easy to access.
In P1, finish the vine block before retreating for the blast.
In P2, use orange intersections and the later ground portal.
In P3, leave each collapsing quadrant promptly and reset prayer between parries.
In P4, check safe ground and Ocellus's overhead before attacking.
Locate each orb early, keep moving while it charges, and collect before it vanishes.
Coordinate shared braziers and prioritize survival whenever an extra attack would delay movement.