Summary
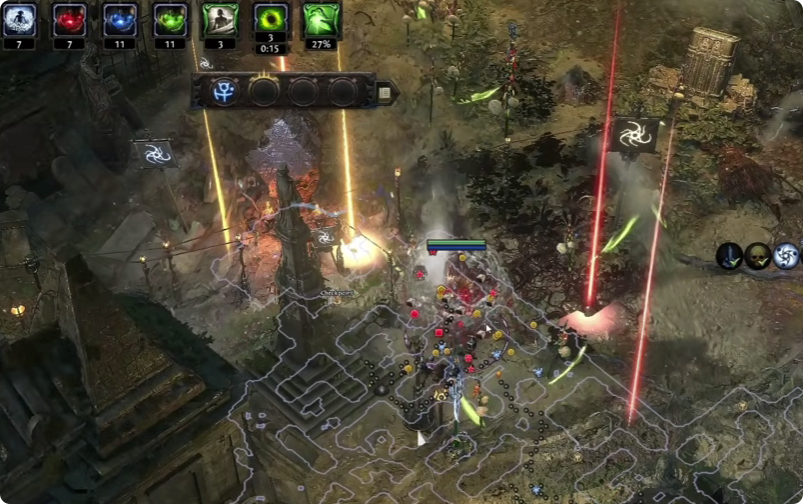
The Azmeri Spirits Strongbox strategy is one of the most elaborate high-investment farming methods in PoE2. Instead of rushing through maps, you prepare a map, find a Sacred Spirit, and use it to create a chain reaction through Strongboxes.
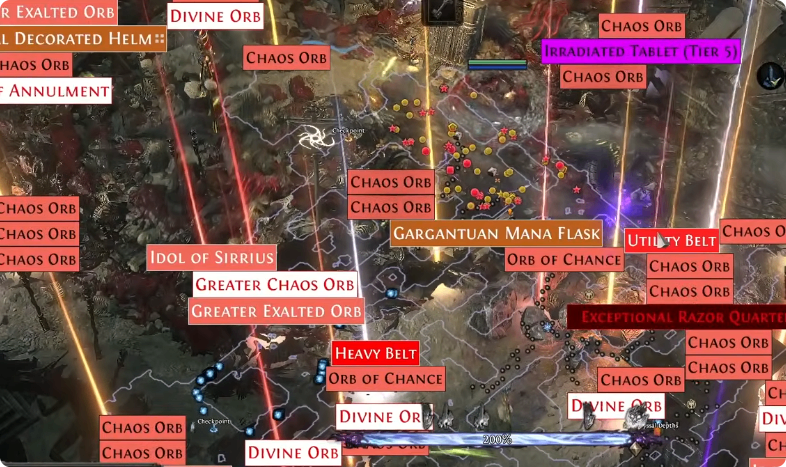
When everything works correctly, dozens of spirits can accumulate around Strongboxes, creating enormous loot explosions that can include raw Divine Orbs, Rite of Passage items, Magebloods, Headhunters, and other valuable rewards.
The setup is expensive and time-consuming, however, so this is not a traditional Divines-per-hour strategy. Each map can cost around 10 POE 2 Divine Orbs to prepare, and some maps must be abandoned if the required spirit chain does not develop.
How the Azmeri Spirits Strongbox Farm Works
The entire strategy revolves around getting Sacred Spirits to possess Strongboxes.
Azmeri Spirits normally appear as colored wisps around the map. Common spirits can be yellow, purple, or blue, while the much rarer Sacred Spirits appear orange.
Your goal is to find an orange Sacred Spirit and make it possess a Strongbox. Once that happens, the spirit chain can begin.
Why Sacred Spirits Are So Important
The key Atlas interaction comes from the Sacred Sap Otus Keystone. With the relevant passive selected, monsters possessed by a Sacred Spirit are also possessed by another random spirit.
This creates the chain reaction:
1. A Sacred Spirit possesses a Strongbox.
2. Monsters released from that Strongbox inherit additional spirits.
3. Those monsters can revive or release more spirits.
4. The released spirits move toward other Strongboxes.
5. More Strongboxes become possessed.
6. The process continues until a large number of Strongboxes are heavily possessed.
There are two types of Sacred Spirits used by this strategy: Hare and Fox.
Hare is generally the more valuable outcome because its possessed monsters have a chance to revive. Each revival can contribute to the spirit multiplication process.
Fox upgrades monster rarity, progressing monsters from Normal to Magic, Rare, and eventually Unique. With the appropriate Hilda Atlas Master effect, possessed Unique monsters release spirits when they die, further supporting the chain.
Map and Tablet Setup
The goal of the Atlas setup is to maximize two things: the number of Strongboxes and the number of Azmeri Spirits.
More spirits increase the chance of finding a Sacred Spirit, while more Strongboxes increase the amount of loot when you successfully trigger the chain.
Use Three Expedition Tablets
The recommended setup uses three Expedition Tablets and one Overseer Tablet.
On the three Expedition Tablets, look for:
Expeditions contain two Buried Strongboxes in Maps.
Increased chance for Maps to contain Azmeri Spirits.
In an Ezomyte City biome, tablet effects receive additional scaling, allowing the Expedition modifiers to generate significantly more Strongboxes.
The described setup can produce two Expeditions with roughly nine Strongboxes each, for around 18 Strongboxes before additional effects.
Use an Overseer Tablet for More Spirits
The fourth tablet should provide:
Maps contain two additional Azmeri Spirits.
Combined with the relevant Otus Atlas passive, this increases the number of spirits generated by the setup and improves your chances of encountering a Sacred Spirit.
Choose Ezomyte City Maps
The recommended map region is Ezomyte City because it combines two useful properties.
First, City maps allow you to take advantage of stronger tablet effects. Second, Ezomyte City provides the Grass biome benefit, which increases the chance for Azmeri Spirits to be Sacred Spirits.
This makes the biome particularly useful for the strategy.
200% Delirium or Wildwood?
The setup can use either 200% Delirium or Sacred Bloom Wildwood.
The described strategy favors 200% Delirium because it produced noticeably more loot during testing. Delirium also adds additional rewards while the large number of Unique monsters created by Fox spirits can further increase the value of the map.
Wildwood remains an alternative if you want to avoid the additional preparation associated with 200% Delirium.
Choose Your Atlas Master
The main choice is between Hilda and Doriani.
Hilda
Hilda is the preferred option when your build is strong enough to handle the extreme difficulty.
Her relevant effect makes possessed Unique monsters release spirits when they die. This is particularly valuable with Fox Sacred Spirits, allowing even Fox maps to generate a useful chain reaction.
The downside is that dying can end the run, and these maps can become extremely demanding and laggy.
Doriani
Doriani provides an additional portal and can make Hare maps considerably more rewarding through stronger map effects.
This is useful if survivability is a concern or if your build struggles with the enormous monster density.
The drawback is that Fox-only maps become less attractive, meaning you may abandon even more maps during the preparation process.