Summary:
This SAND: Raiders of Sophie guide reveals the strongest solo and duo Trampler build currently dominating PvP raids. Using the Midling chassis, reinforced reactor protection, captain compartment defense, and optimized weapon layout, SAND: Raiders of Sophie Crown, this setup delivers excellent survivability and combat performance.
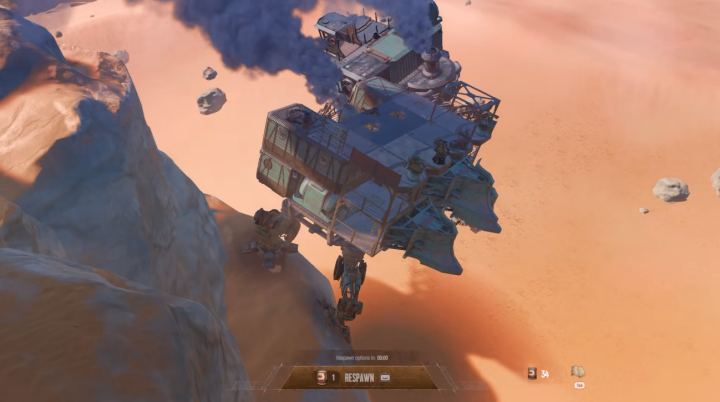
SAND: Raiders of Sophie Solo Duo Build Overview
Building a powerful Trampler is one of the most important parts of surviving in SAND: Raiders of Sophie. A strong vehicle is not only about adding more weapons but also about protecting your reactor, preventing enemies from stealing your Trampler, and creating a design that can survive long PvP encounters.
This optimized solo duo build focuses on the Midling chassis, a balanced platform that provides enough weight capacity while allowing players to maximize defensive structures. The entire build costs around 1,355 Crowns and 3,500 Mechanical resources, making it accessible while still being extremely effective in endgame raids.
The main goal of this design is simple: protect the reactor from the front and sides, secure the captain’s compartment, and create enough firepower to win fights against other players.
Why the Midling Chassis Is the Best Choice
The foundation of this build is the 4x3 Midling chassis. Compared with other chassis options, the Midling provides excellent width and enough space to build around a powerful 2x2 reactor.
The wider structure allows players to fully protect the reactor from multiple directions. Since the reactor is the heart of your Trampler, keeping it hidden behind defensive modules is the most important priority.
The 2x2 reactor used in this build provides:
9,500 HP
Strong defensive positioning
Full side protection when placed correctly
The reactor should be positioned flush with the Trampler body instead of sticking outside. If the reactor extends beyond the frame, enemies can easily shoot it from the side and destroy your vehicle quickly.
Reactor Protection and Defensive Layout
The biggest strength of this build is the layered defense system around the reactor.
The left side uses:
Two-player crew cabins
Standard deck supporting frames
Additional structural protection
The crew cabins are positioned with the fans facing backward because the doors only open from one direction. Players can duplicate the design on the second floor, creating additional protection around the reactor.
The second floor is extremely important because many players make the mistake of only defending the first level. Since reactors occupy two floors, leaving the upper section open allows enemies to shoot directly into your core.
A complete Trampler defense requires protection from both above and below.
Captain Compartment Protection Using Small Engine Technology
One of the strongest parts of this build is the captain compartment defense.
The setup uses:
Tier 1 Captain’s Compartment
Small Engine placement
Defensive airlock design
The small engine is placed directly in front of the captain compartment entrance. This creates an additional barrier that enemies must pass through before reaching the control system.
This is extremely valuable because stealing a Trampler is one of the fastest ways to win a raid.
If an enemy reaches the black control box inside the captain compartment, they only need around 10 seconds to steal the vehicle. Once stolen:
The original owner loses door access
Respawn options disappear
The Trampler is permanently lost
Because of this, protecting the captain compartment is just as important as protecting the reactor.
Important Spawn Setting Tip
Players using this build must change their spawn location immediately after entering a raid.
By default, your bed is assigned to the captain compartment. However, because the small engine blocks the entrance, spawning there can trap you inside.
The recommended strategy is:
Enter the raid
Move your bed to a crew compartment
Keep your captain compartment protected
This simple adjustment prevents one of the biggest problems with this defensive setup.
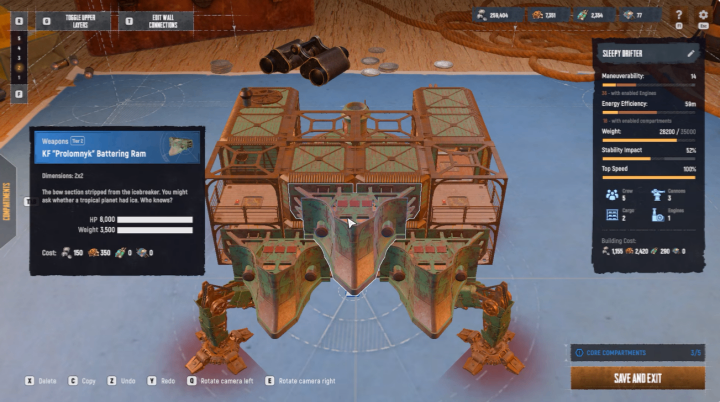
Front Armor Setup: Cargo Bays and Battering Rams
The front of the Trampler receives the heaviest attacks, so this build uses multiple defensive layers.
The main front protection includes:
Two Cargo Bay Parallels
Supporting frames
Battering Rams
Cargo Bay Parallels provide:
7,000 HP
Strong frontal protection
Extra space for absorbing enemy shots
Players should place one cargo bay on the lower section and another above it. This forces enemies to destroy multiple layers before reaching the reactor.
However, cargo bays require repair kits and may need the engine or reactor turned off during repairs.
That is why the build also uses Battering Rams.
Battering Rams are considered one of the best defensive components because they are easy to repair. Players can repair them directly with character repair tools without shutting down important systems.
Weapon Setup and Turret Optimization
The top section of the Trampler focuses on combat performance.
The recommended setup includes:
Two Armored Turret Decks
One Frame Turret Deck
Tier 1 Fly Bridge
The Tier 1 Fly Bridge is preferred because of the Midling chassis weight limit.
A Tier 2 Fly Bridge provides more protection but pushes the vehicle over the weight limit. Players who want to use Tier 2 can replace some armored turret decks with lighter versions.
However, armored turret decks are preferred because they survive more direct hits.
Against weapons like the 80mm cannon:
Armored turret decks survive around four shots
Frame turret decks usually survive around three shots
During PvP battles, keeping your cannons operational is critical, so extra durability is worth the investment.
Recommended Raid Equipment Loadout
For solo and duo PvP raids, the recommended player inventory includes:
Weapons:
MA2 Rifle
Peppermill Shotgun
Blitz Pistol
Ammunition:
Rare FMJ rounds for enemy players
Standard ammo for PvE enemies
Shotgun shells
Utility:
Energy rods
Med kits
Contact grenades
C4 explosives
FMJ ammunition is especially powerful because it can bypass armor. Headshots can often eliminate enemies instantly.
C4 is also extremely valuable because it provides a backup strategy. If your own Trampler is destroyed, you can attempt to steal another player's vehicle.
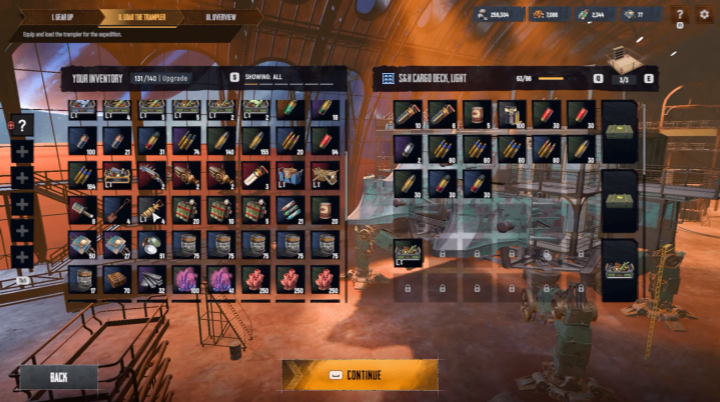
Storage Organization and Raid Preparation
Efficient storage management is essential in SAND: Raiders of Sophie.
Recommended organization:
Cargo Bay:
Ammo
Repair supplies
Food
Storage Deck:
Extra cannons
Cannon ammunition
Utility items
Food is especially important because it affects respawn speed.
Without food:
Respawn takes around one minute
With food stored inside compartments:
Respawn takes only 10 seconds
Players should place food in multiple compartments to avoid losing fast respawns if one area is destroyed.
PvP Performance and Real Raid Results
During testing, this Midling Trampler build performed extremely well against real players.
The defensive design successfully protected the captain compartment even after multiple C4 attempts. The small engine technology created such a strong barrier that enemies struggled to access the control system.
The build also performed well during PvP encounters because:
The reactor remained protected
Cannons stayed operational
Repairs were easy
Storage was organized
In one successful raid, the build extracted with approximately 23,000 Crowns worth of loot, proving that the design is capable of both surviving fights and generating profit.
Final Thoughts: The Best Solo Duo Trampler Build in SAND
This Midling chassis Trampler build is currently one of the strongest solo and duo setups in SAND: Raiders of Sophie. It combines strong reactor protection, captain compartment security, reliable weapons, cheap SAND: Raiders of Sophie Crown, and efficient storage management.
While future updates may change vehicle balance, this design provides one of the best foundations for PvP players looking to dominate raids.
For players who want a reliable Trampler that can survive enemy attacks while still delivering strong offensive power, this Midling chassis setup is an excellent choice.