Summary: The Skull and Bones Galleon has quickly become one of the most interesting large-ship options for players who want to combine heavy survivability with high burst damage. Its 40 gun ports give it enormous broadside potential, while its unique Iron Thunder and Red Wake perks reward captains who stay aggressive and fight at close range.
This particular Galleon setup focuses on Toxic damage, weak-point pressure and sustained DPS. Instead of relying entirely on an auxiliary weapon, the build uses carefully selected cannonball weapons, Toxic effects, Skull and Bones Silver, Lightning Strike and damage amplification to create short but extremely strong damage windows.
Why Iron Thunder and Red Wake Work So Well
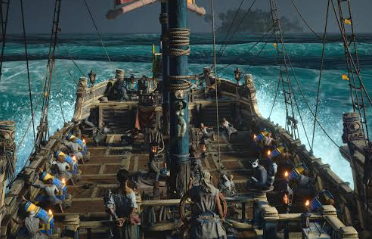
The foundation of the build is the Galleon's two signature perks.
Iron Thunder adds a second row of lower-deck weaponry and provides a permanent 10% weapon-damage bonus against targets within 350 meters. When the ship is not reloading non-auxiliary weapons, Iron Thunder charges for 1.5 seconds and then provides another 65% damage increase. The effect ends three seconds after dealing damage. Nearby allied small and medium ships can also receive a 10% damage boost while Iron Thunder is active.
Red Wake takes the close-range concept even further. While Iron Thunder is active, targets within 250 meters take 35% more damage. Fully charging Iron Thunder or destroying an enemy also gives the Galleon a 50% top-speed increase for 15 seconds.
This creates a simple combat rhythm: position close to the target, stop unnecessary reloads, build Iron Thunder, then unload your broadside during the damage window.
Focus on Toxic Damage and Penetration
The build takes several upgrades that improve Toxic damage and penetration, with additional investment into Flooding and Lightning.
The goal is to stack different damage sources instead of depending on a single attack. Toxic effects become especially important because several parts of the setup increase damage against poisoned targets.
The front weapon is built around a Toxic ammunition strategy, while the rear setup adds armor penetration and additional utility. The result is a ship that can continue pressuring targets after the first volley instead of relying on a single burst.
This is particularly useful during longer fights where enemies survive the opening barrage.
Blight M Gives the Build Its Damage Window
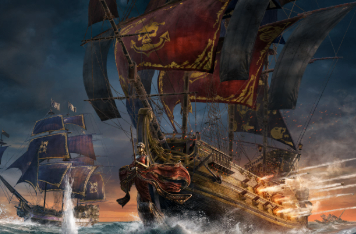
One of the key weapons in this setup is the Blight M, which is paired with Toxic ammunition.
Landing 15 hits in a single volley increases weapon damage dealt to the target for a limited period. Poisoned enemies then become even more vulnerable to incoming damage from other sources.
That makes the opening attack important. Rather than immediately firing everything at once, start with the Blight M and use its status effects to prepare the target for the rest of the build.
Once the Toxic effects are active, follow with the rest of your broadside and take advantage of the increased damage window.
Weak-Point Hits Make Toxic Even More Dangerous
The build also invests in the Outbreak effect.
Outbreak gives weak-point hits a chance to trigger the Poison status. Consecutive weak-point attacks increase that chance, rewarding players who can consistently aim at vulnerable sections of enemy ships.
This is one of the biggest differences between a basic Galleon DPS setup and a more optimized version. You are not simply firing as quickly as possible. You are deliberately aiming for weak points to maintain status effects and amplify your overall damage.
For experienced captains, this can make a significant difference during elite encounters and tougher seasonal enemies.
Battle Tempo Completes the Damage Setup
The skill progression also invests heavily into Battle Tempo, including the Flooding, Penetration, Lightning and Toxic branches.
The idea is to create layered secondary damage rather than maximizing one single stat.
Toxic damage helps maintain pressure over time, Penetration improves the effectiveness of the ship's weapons against armored targets, while Lightning adds another source of burst damage.
This combination works particularly well with Iron Thunder because the Galleon can compress several bonuses into the same short attack window.

Recommended Furniture and Defensive Setup
The build uses a mixture of offensive and defensive furniture to support long fights.
The centerpiece is the Hallmarker Table, supported by options such as the Classic Ball Station, Ramrod Workshop, Ledger Vault Array and Plaguebringer Ward.
The defensive setup also includes an armor configuration focused on survivability, resistance and removing severe damage effects.
That matters because this Galleon is designed to fight close to enemy ships. Red Wake's 250-meter damage bonus encourages aggressive positioning, so you cannot build entirely around long-range safety.
Instead, the ship needs enough durability to remain inside its ideal combat range long enough to complete its damage rotation.
How to Play This Galleon DPS Build
The most important part of the build is timing.
Do not waste your Iron Thunder window on a weak target or fire immediately before the damage bonus is fully charged. Position first, allow the effect to build, then unleash your main broadside.
Opening with the Blight M is useful for establishing Toxic pressure. After the target becomes poisoned, follow with your other weapons and aim for weak points whenever possible.
Red Wake then gives you additional close-range damage and a major movement-speed boost after fully charging Iron Thunder or destroying a target.
This makes the Galleon particularly effective at staying on top of vulnerable targets, repositioning quickly and preparing for the next attack cycle.
Is This Galleon Build Worth Using?
For players looking for a high-DPS Skull and Bones Galleon build, the Iron Thunder Toxic setup has a clear identity.
It combines heavy broadside firepower with Toxic damage, penetration, Buy Skull and Bones Silver, weak-point effects and close-range damage amplification. The build is strongest when you can stay within the ideal range and consistently land your shots.
It is not a passive long-range setup. You need to manage reload timing, maintain your Iron Thunder charge, apply Toxic effects and take advantage of Red Wake.
Once those mechanics become familiar, however, the Galleon can turn a short damage window into an extremely powerful burst sequence.
For aggressive captains who want their Galleon to feel more like a frontline damage dealer than a slow defensive platform, this Iron Thunder and Red Wake DPS build is one of the most compelling ways to build around the ship's current mechanics.