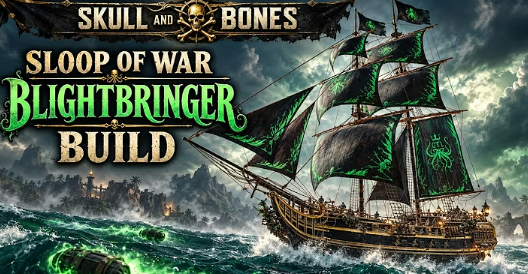
Skull and Bones players chasing reliable toxic damage often ask which Sloop of War build hits hardest without giving up survivability. This build pairs poison-focused perks with a torpedo-heavy skill tree to land strong single-target and area damage while staying durable through long fights. Should you prioritize weak point damage or overall poison uptime? Which support item actually changes the outcome? This guide covers the ship's stats, its Plaguebringer and Spite perks, the recommended skill tree, and two complete equipment configurations. It's written for players who already own a Sloop of War and want a tested toxic damage setup for endgame content.
Ship Stats Overview
Solid Health With Balanced Mitigation
At upgrade level 77, this Sloop of War reaches roughly 82,300 health and 9,460 brace strength, giving it enough cushion for extended engagements. Armor sits at 1,409, backed by mitigation values of 14% combustion, 39% flooding, 24% fire, 29% piercing, 24% electric, and 34% toxic. Toxic and flooding resistance stand out, which matters since the build leans on poison weapons and perks. Players still gearing up their own hull can use these numbers as a benchmark to aim for.
Poison Perk Synergy
Plaguebringer And Spite Stack Pressure
The ship's two core perks both scale off keeping enemies poisoned. Plaguebringer raises poison damage by up to 6% and duration by up to 20% per consecutive hit (capping at 30% damage, 100% duration), and each weapon hit has a chance to trigger a 300-meter explosion dealing 1,000 toxic damage to a poisoned target; it also adds 20% toxic weapon damage and 150% poison charge rate. Spite spreads 50 toxic damage per second to nearby enemies for 10 seconds and cuts incoming damage from poisoned targets by 30%. Players who favor sustained pressure over pure burst will get the most out of this pairing.
Skill Tree Focus
Impetus, Torpedo, And Repair Nodes
The tree centers on the Impetus Order line: Unstoppable Force for movement-based stacking instead of landing eight separate hits, plus Rejuvenation for 3% max health restored as impetus builds. At 10 stacks, Firepower Order fires the auxiliary weapon and grants full weak point damage for 8 seconds. From there, the path runs through Killing Drive into Volatile Arsenal, picking up flooding and toxic penetration and damage on the way to Battle Tempo, with Critical Damage Control repairing 4% of severe damage per second after 30 seconds without taking damage. It finishes through Vital Strike into Hard Munitions, one reload node, one weak point node, and a full health line ending in Revitalize Fury, which adds 15% weapon damage and repair for 5 seconds whenever a heal restores 3% max health. The full torpedo line is taken as well. This setup suits players who sail actively rather than parking to farm impetus or Skull and Bones Silver.
Weapon Loadout Breakdown
Torpedoes, Auxiliary, And Armor Choices
The table below lays out the core equipment slots and the perks rolled on each item.
Slot | Item | Key Perks | Best For |
Bow torpedoes (x2) | Blightbringer | Noxious, Amplified Toxic, Soul Mending, Lightning Strike | Maximum toxic torpedo output |
Stern torpedo | Blightbearer | Incendiary, Double Soul Mending, Enduring Embers | Sustained self-repair and burn pressure |
Auxiliary weapon | Loflu | Sharpen Severity, Amplified Toxic, Mega Corpse Bomb | Sharpened toxic, combustion, flooding, electric damage |
Armor | Noturn Heart | Euphoria, Resist All, Maintenance, Survivor, Severe Damage Removal | Steady weapon damage above 75% health |
The bow torpedoes, and armor perk combination carry most of the build's identity — everything else supports keeping that toxic damage flowing.
Two Build Variants
Choose Burst Or Utility Support
The build runs two viable support-item configurations depending on your goal. Running a pulse station as the support item pushes torpedoes to roughly 110,000 damage per hit, spiking to around 490,000 on a weak point hit — the pick for players chasing the highest single burst numbers. Swapping in ADC Tuning Station I, Torpedo Works I, Copper Fashioning Station, Plaguebringer's Ward, and Expanding Corkscrew Station trades some of that peak burst for broader torpedo utility, which suits players who want more consistent output across a fight rather than one large spike.
What Does The Spite Perk Do?
Spite makes poisoned enemies deal 50 toxic damage per second to targets within 300 meters for 10 seconds, and it lowers the damage you take from any target currently poisoned by 30%. It rewards keeping enemies poisoned continuously rather than applying it once and moving on.
How Do You Trigger Revitalize Fury?
Revitalize Fury activates whenever a single heal restores at least 3% of your maximum health. Once triggered, it adds 15% to both weapon damage and repair amount for 5 seconds, so pairing it with the build's passive 3%-per-110-meters healing keeps it active often during active sailing.
Is The Pulse Station Support Item Worth Using?
It's worth using if your goal is the highest possible weak point burst, since it's the configuration behind the roughly 490,000-damage torpedo hits. Players who value steadier, repeatable output across longer fights may prefer the alternate five-item utility configuration instead.
How Often Does This Build Heal While Sailing?
The build restores 3% of maximum health every 110 meters sailed, independent of combat healing from Revitalize Fury or Critical Damage Control. That passive regeneration is part of why the build can sustain long engagements despite its torpedo-focused offense.
Quick Tips
· Keep an enemy poisoned continuously rather than reapplying it — both Plaguebringer and Spite scale with consecutive poisoned hits.
· Sail actively to build Impetus stacks through Unstoppable Force instead of relying on landing eight separate hits.
· Use the pulse station support item only when maximum burst matters more than sustained output.
· Watch your health threshold, since Euphoria on the Noturn Heart armor only applies its 15% weapon damage bonus above 75% health.
Who Benefits Most?
Toxic damage fans get a clear, tested loadout built entirely around poison uptime rather than a generic damage build. Endgame PvE players benefit from the survivability numbers and repair loop that let the build hold up in longer fights. Players choosing between burst and utility get two full support-item configurations to match their playstyle instead of a single fixed setup.
This Sloop of War build works because its perks, skill tree, and equipment all reinforce the same idea: keep enemies poisoned and let toxic damage compound. Players who already own the hull can copy the loadout directly, while others now know exactly what to aim for once they unlock it—and cheap Skull and Bones Silver can help bridge the gap in gear and upgrade costs.