Want to melt enemy ships with explosive lightning, flooding pressure, and brutal broadside damage? This Stormtongue Schooner build turns every cannon volley into a storm of status effects, explosive bursts, and serious sustained damage. Built around Electric III culverins, Lightning Strike, flooding, and the Schooner’s Fury perk, it can shred bosses, dominate siege targets, and transition smoothly onto ships like the Galleon, Corvette, Brigantine, or Padewakang. The real question is simple: do you want a flashy electric theme, or do you want enemies disappearing before they can react? With the right furniture, armor, and mastery choices, you get both.
Why This Electric Flooding Build Hits So Hard
This setup stacks multiple damage layers at once:
- Electric damage to trigger Stormstruck.
- Flooding damage for sustained pressure.
- Explosive damage amplified by the Schooner’s Volatile perk.
- Broadside damage boosted by Fury and Ramrod Workshop.
- Extra damage against Stormstruck targets through furniture bonuses.
The Schooner is especially effective because its perks enhance broadside weapon damage, explosive damage, and structure damage. Fury can trigger from weapon hits, increasing broadside damage while creating damaging explosions within 100 meters. Volatile then adds 20% explosive damage to every broadside weapon and cuts explosive reload time by 10%.
That means your broadside is not just firing culverins. It is stacking status effects, detonating explosions, and hammering targets with repeated amplified hits.
Best Ship Choice: Schooner First, Galleon Second
The Schooner is the cleanest home for this build due to its broadside-focused perks. It offers excellent speed, positioning, and consistent explosive pressure, making it ideal for players who want to keep targets at range while constantly applying Stormstruck and Flooding.
The Galleon is a powerful alternative for players who prefer raw durability and massive broadside volume. A Galleon can equip enough broadside firepower to turn this setup into a boss-killing machine, especially against enemies with weak electric resistance.
Other viable ships include:
- Corvette: Great for aggressive mobility and broadside engagements.
- Padewakang: A solid option for players leaning into explosive weapons.
- Brigantine: Useful for a flooding-focused variation with strong chase potential.
The Schooner is the best all-rounder. The Galleon is the choice for players who want to stand their ground and erase health bars.
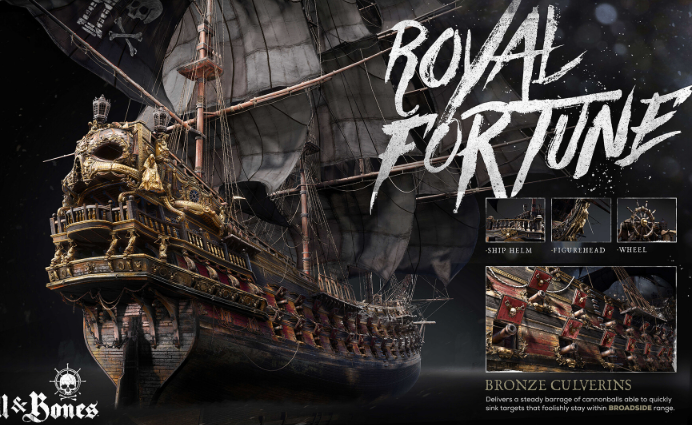
Core Weapon Setup: Stormtongue Culverins Bring the Thunder
The key weapon is the Stormtongue, an Electric III culverin with strong base damage and excellent synergy with Lightning Strike. Culverins are the right choice here because they deliver fast, repeatable broadside damage while keeping the pressure high enough to trigger your ship and furniture effects.
Recommended weapon perks:
- Shock: Improves electric damage and helps enable Stormstruck.
- Overflow: Adds flooding, creating another damage source and opening more furniture synergies.
- Soul Mending: Gives vital healing, especially if using Blood Fuel.
- Lightning Strike: The preferred mythic perk for repeated electric damage and stronger Stormstruck application.
Lightning Strike is generally more reliable than Voltaic Charge in this setup. Voltaic Charge can hit hard when Stormstruck triggers, but Lightning Strike keeps the electric pressure rolling across the fight. More Stormstruck uptime means more damage bonuses, more control, and more explosive momentum.
If you want an alternate perk combination, use:
- Shock
- Overflow
- Rupture
- Second Storm
Second Storm spreads electric damage to a nearby target, making it useful in group fights and dense encounters. It may not always create huge single-target differences, but it adds valuable pressure when several enemies are close together.

Bow and Auxiliary Options: Keep the Theme or Chase Maximum Damage
For the bow, Stormtongue works well with Soul Mending, Shock, Overflow, and Lightning Strike. Since this weapon does not naturally provide healing, Soul Mending is highly valuable for survival and for offsetting Blood Fuel’s risk.
For the auxiliary weapon, use **Eye of Heaven** if you want to maintain the electric identity of the build. It fits the theme and continues the Stormstruck pressure.
However, if your priority is maximum damage rather than theme, a **Dardanelles Gun**-style heavy-damage auxiliary option can outperform it. Flooding-based auxiliary weapons also become more attractive if you are using Expanding Corkscrew.
Need faster access to upgrades, furniture, or build resources? Buy Skull and Bones Items at mmoexp, save your sanity, and enjoy the real endgame**. A completed build is where the real destruction starts.

Armor Choice: Survivability for Events, Damage for Bosses
For general activities, Buccaneer’s Oath is a dependable armor choice. It offers a comfortable balance of defense and utility, making it useful for world events, PvE encounters, and regular ship combat.
For bosses, switch to Nocturne’s Heart. This armor is better suited to sustained damage output and high-pressure encounters where every extra point of offense matters.
The best armor depends on your objective:
- Use Buccaneer’s Oath for safer general gameplay.
- Use Nocturne’s Heart for boss damage and aggressive encounters.
- Choose based on your comfort level with incoming damage and Blood Fuel management.
Furniture Setup: Stack Damage Until Ships Disappear
The furniture is where this build becomes dangerous. Each slot reinforces broadside damage, Stormstruck damage, reload speed, flooding, or long-range pressure.
Recommended furniture:
- Hallmarker Table: A major damage option, particularly for combustion-related scaling.
- Caustic Spa Station: Provides up to 30% bonus damage and additional benefits at longer range.
- Leaden Vaultteray: Reduces reload time and increases damage to Stormstruck enemies.
- Copper Fastening Station: A dependable overall damage boost.
- Ramrod Workshop: Increases broadside damage and supports the Schooner or Galleon playstyle.
- Culverin Works: An easy-to-obtain damage option that directly supports the core weapon choice.
Caustic Spa Station is especially strong when fighting from over 200 meters away, granting a noticeable overall damage increase. Leaden Vaultteray then adds even more value by improving reload speed and rewarding Stormstruck uptime.
If you do not own Hallmarker Table, Wyrm’s Breath Churner is a workable replacement. If Leaden Vaultteray is unavailable, consider **Charge Stores** for a more accessible option. If Ramrod Workshop is missing, **Expanding Corkscrew** can support the Flooding side of the build, though you may sacrifice some reload efficiency.
Mastery Tree: Prioritize Culverins, Flooding, Explosives, and Lightning
The mastery setup should be focused, not scattered. This is a damage build, so invest heavily in every multiplier that supports your weapon and status-effect package.
Prioritize these mastery upgrades:
- All available Culverin Damage nodes.
- Projectile Speed nodes, especially where they contribute to Flooding damage.
- Flooding Damage and Flooding Penetration.
- Explosive Damage and Explosive Penetration.
- Lightning Damage and Lightning Penetration.
- Specialized Munitions.
- Reactive Compounds and Munitions.
- Shield of Contempt.
- Fervor.
- Blood Fuel, if you are comfortable managing its health risk.
Blood Fuel raises the build’s damage ceiling, but it can also punish mistakes. If you are dying to your own damage effects or taking too much incoming fire, turn it off. The build remains strong without it. To Buy Skull and Bones Silver, please go to MMOEXP.
Combat Rotation: Apply Stormstruck, Then Let the Broadside Rip
The combat plan is simple but brutal:
1. Open with electric hits to apply Stormstruck.
2. Maintain Flooding through Overflow.
3. Keep firing broadsides to trigger Fury and explosive effects.
4. Fight at range when possible to benefit from Caustic Spa Station.
5. Use auxiliary fire to maintain pressure or burst vulnerable targets.
6. Avoid overcommitting with Blood Fuel when your health is already low.
Once Stormstruck is active, the damage spikes hard. Broadside volleys can produce massive numbers, including hits approaching 97,000 damage in favorable conditions. Bosses that are weak to electric damage can lose health at an alarming rate once their brace is removed.
This is not a slow, passive setup. It is a constant-pressure build designed to make every second of broadside contact hurt.
Who Should Use This Build?
This build is ideal for players who enjoy aggressive broadside combat, status-effect stacking, and high sustained PvE damage. It is especially valuable for:
- Schooner players wanting a top-tier broadside build.
- Galleon players seeking heavy boss damage.
- Players with Stormtongue culverins and Lightning Strike.
- Captains who enjoy electric and flooding status effects.
- Siege-focused players who want stronger structure damage.
- Endgame players looking to optimize furniture and mastery synergy.