Summary
The Sonic Shred Druid has become one of Diablo 4's strongest endgame builds, capable of dealing over 1.5 quadrillion damage while clearing Pit 135 with only one Mythic Unique. Here's how to optimize gear, survivability, Paragon choices, Mythics, Diablo 4 Items, and hidden mechanics to push the highest tiers of Season endgame.
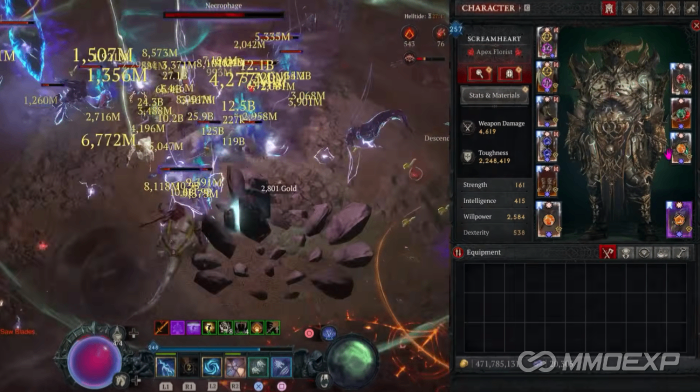
The Sonic Shred Druid Is Breaking Diablo 4's Endgame
Diablo 4's latest season has introduced several incredibly powerful builds, but few are as explosive as the Sonic Shred Druid. With the right setup, players have reported damage exceeding one quadrillion, occasionally reaching 1.5 quadrillion during ideal damage windows.
Even more impressive is that these numbers aren't dependent on perfect gear. The showcased version of the build is played in Seasonal Solo Self-Found, uses only one Mythic Unique, features mostly single Greater Affix gear, and hasn't even fully utilized Transfiguration for additional damage.
That means there is still room for improvement.
Rather than serving as a complete beginner guide, this optimization focuses on maximizing the build for high Pit pushing, explaining several mechanics that many players misunderstand.
Progressing Into the Endgame Version
The build follows a natural progression instead of requiring expensive equipment immediately.
A typical path looks like this:
Begin with a Chaos Storm leveling setup.
Obtain the two-piece Storm Shepherd set.
Transition into the first Shred build.
Upgrade into the speed-farming version.
Move into the midgame configuration.
Finish with the fully optimized Pit-pushing variant.
Each stage gradually increases damage while allowing players to continue farming efficiently without major roadblocks.
How the Build Applies Vulnerable
One of the most frequently asked questions concerns Vulnerable application.
Instead of relying on traditional methods, the build uses the Overcharged utility Aspect placed on the amulet through the Horadric Cube's Transfiguration system.
Players repeatedly reroll the amulet until receiving either:
Overcharged Aspect
Great Storm Aspect
Although both function well, Overcharged provides the highest overall damage multiplier and is considered the preferred option for pushing the hardest content.
Why Lightning Storm Sometimes Disappears
Many players believe Lightning Storm is bugged because it occasionally becomes invisible during Grizzly Rage.
The explanation is much simpler.
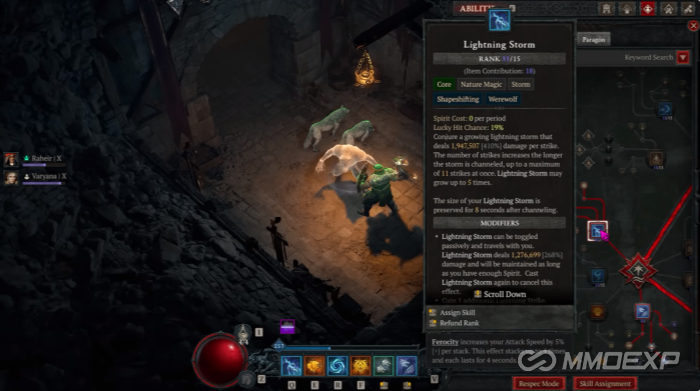
Lightning Storm only displays correctly if the Werewolf option is selected while inside Grizzly Rage.
Besides fixing the visual issue, this setting also increases Lightning Storm's damage output, making it mandatory for maximum performance.
Survivability Matters More Than Players Think
Although the Sonic Shred Druid is capable of absurd damage numbers, surviving Pit 130+ is equally important.
The build intentionally sacrifices some defensive power to maximize damage, meaning occasional deaths are expected when pushing the highest tiers.
Several defensive priorities dramatically improve consistency.
Stack Maximum Life Everywhere
Maximum Life should appear on nearly every equipment slot whenever possible.
As gear improves, offensive affixes such as Critical Strike Chance or Armor can often be replaced with Maximum Life without sacrificing meaningful damage.
A larger health pool significantly reduces random one-shot deaths.
Cap Your Resistances
Resistance management is another major priority.
Defensive gear—including chest armor, pants, and boots—should all feature All Resistance.
Gem choices should prioritize the damage types most commonly responsible for deaths:
Poison
Lightning
Fire
Physical Resistance whenever possible
Cold damage remains especially dangerous in high Pit tiers, making resistance optimization increasingly valuable as difficulty rises.
Endgame Gear Optimizations
Several small equipment decisions combine into substantial overall improvements.
Helmet
Instead of Resource Generation, Cooldown Reduction is preferred.
Masterworking Cooldown Reduction provides better value because helmet rolls can scale higher than ring affixes.
Amulet
Resource Generation Tempers outperform Lucky Hit Resource Generation due to existing Spirit generation coming from:
Tibault's Will
Blood Howl
Lust for Carnage
Additional passive Spirit recovery
The result is smoother gameplay with fewer resource issues.
Chest Armor
Maximum Resource on the chest allows players to swap Spirit Boons and use Prickleskin, increasing overall damage without sacrificing resource stability.
Which Mythic Unique Should You Farm First?
If you're crafting Mythic weapons, there is one clear recommendation.
Ifas Dire Totem provides the single largest damage multiplier for the build.
Crafting one-handed Mythics also offers a chance to obtain:
Ifas Dire Totem
Waxing Gibbous
Because both are useful outcomes, this crafting category offers one of the best returns for players chasing their first Mythic upgrade.
Critical Strike Is Easier to Cap Than You Think
One surprising optimization involves Critical Strike Chance.
Once properly optimized, the build reaches a full 100% Critical Strike Chance.
In fact, it's possible to exceed the cap enough that Paragon points invested into Critical Chance can be reassigned elsewhere.
Those freed points can instead strengthen:
Critical Strike Damage
Vulnerable Damage
Attack Speed
Willpower
This results in a noticeable increase in overall DPS.
Freeze Is Secretly One of the Strongest Mechanics
Talisman selection is another area where optimization matters.
Nature Magic Skill bonuses remain ideal, but players should specifically look for Chance to Freeze.
Why?
Because certain boss damage multipliers only activate if the boss becomes staggered through Freeze.
Other crowd control effects can actually interfere with this interaction.
Instead of stacking every form of CC available, players should maximize Freeze application while minimizing competing control effects.
The build accomplishes this primarily through the Thul Rune, ensuring bosses enter the correct stagger state for maximum burst damage.
Skill Tree Changes That Improve Pit Performance
The core build remains largely unchanged, but several adjustments improve high-end pushing.
These include:
Taking Overpower instead of additional Unstoppable effects.
Moving Unstoppable onto Blood Howl.
Adding Barrier generation through gloves.
Investing extra points into Cyclone Armor for survivability.
Extending Debilitating Roar duration for better defensive uptime.
None of these changes dramatically alter gameplay, but together they improve consistency during long boss encounters.
Paragon Optimization
Many players over-invest into survivability.
Once defensive requirements are satisfied, remaining Paragon points should shift toward Willpower whenever possible.
Willpower increases multiple offensive stats while improving attack speed through board bonuses.
However, Intelligence nodes should only be taken when they provide meaningful value.
Chasing small additive damage bonuses often costs too many points and ends up lowering overall efficiency.
Hidden Bugs Are Increasing the Build's Damage
Like many Diablo 4 seasons, this build benefits from a few unexpected interactions.
Arch Druid Aspect
Currently, the Arch Druid Aspect appears to provide two separate damage multipliers instead of one.
This effectively grants around a 60% damage increase compared to previous setups.
Unlike complicated exploits, this interaction simply works by equipping the Aspect.
Because of this, players no longer need to use Thunder Gods, opening additional gearing options.
Five-Piece Snapshot Bug
Another interaction involves the five-piece set bonus.
Lightning Storm can "snapshot" the bonus when cast.
If the snapshot succeeds, every subsequent Lightning Storm receives dramatically higher damage until recast.
Testing on training dummies reveals enormous differences.
Without the snapshot:
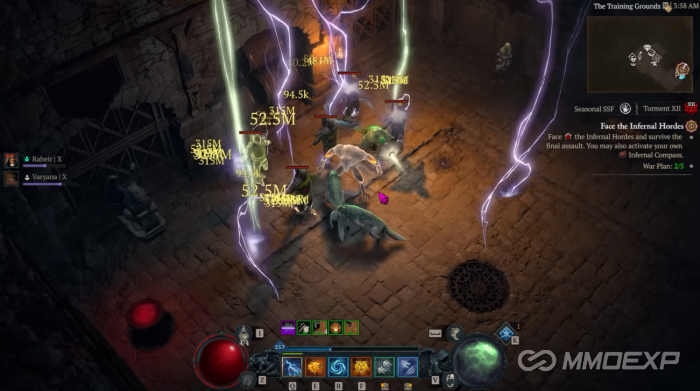
Typical hits range between 50–300 million.
With the snapshot active:
Hits jump into the 500 million to over one billion range before other multipliers are applied.
While this optimization is unnecessary for Torment farming, it becomes valuable for Pit 125+ pushes where every bit of damage matters.
Many players expect Blizzard to eventually remove the snapshot behavior while compensating the build with direct buffs.
Final Thoughts
The Sonic Shred Druid has firmly established itself as one of Diablo 4's premier endgame builds. Even without perfect Greater Affixes, multiple Mythic Uniques, or fully optimized Transfigured gear, the build is already capable of clearing Pit 135 while producing damage numbers exceeding 1.5 quadrillion.
Success, however, isn't simply about stacking offensive stats. Proper resistance management, Maximum Life rolls, optimized resource generation, Freeze mechanics, cheap Diablo 4 Items, and intelligent Paragon allocation all contribute significantly to the build's overall performance.
As Blizzard continues balancing Diablo 4 and eventually addresses current snapshot and Aspect interactions, some of these optimizations may change. But for now, players looking to push the deepest Pit levels will find the Sonic Shred Druid to be one of the strongest and most rewarding builds available, combining incredible mobility, devastating burst damage, and enough flexibility to continue improving well beyond its already astonishing performance.