Summary
We have all followed broken build guides, copied the skills, the gear, the paragon board, only to find out that it doesn't work the same for us, and the damage numbers are not adding up. Today is different. This guide will teach you how to make broken builds yourself from the ground up—choosing one skill, building the damage engine, solving resources, getting defense under control, selecting the right paragon boards, and understanding why specific glyphs matter. By the end, you'll know exactly how to make a build and apply that knowledge going forward. If you'd rather skip the grind, you can buy diablo 4 max roll items—but the real value is understanding the "why" behind every choice.
Step 1: Choose Your Core Skill
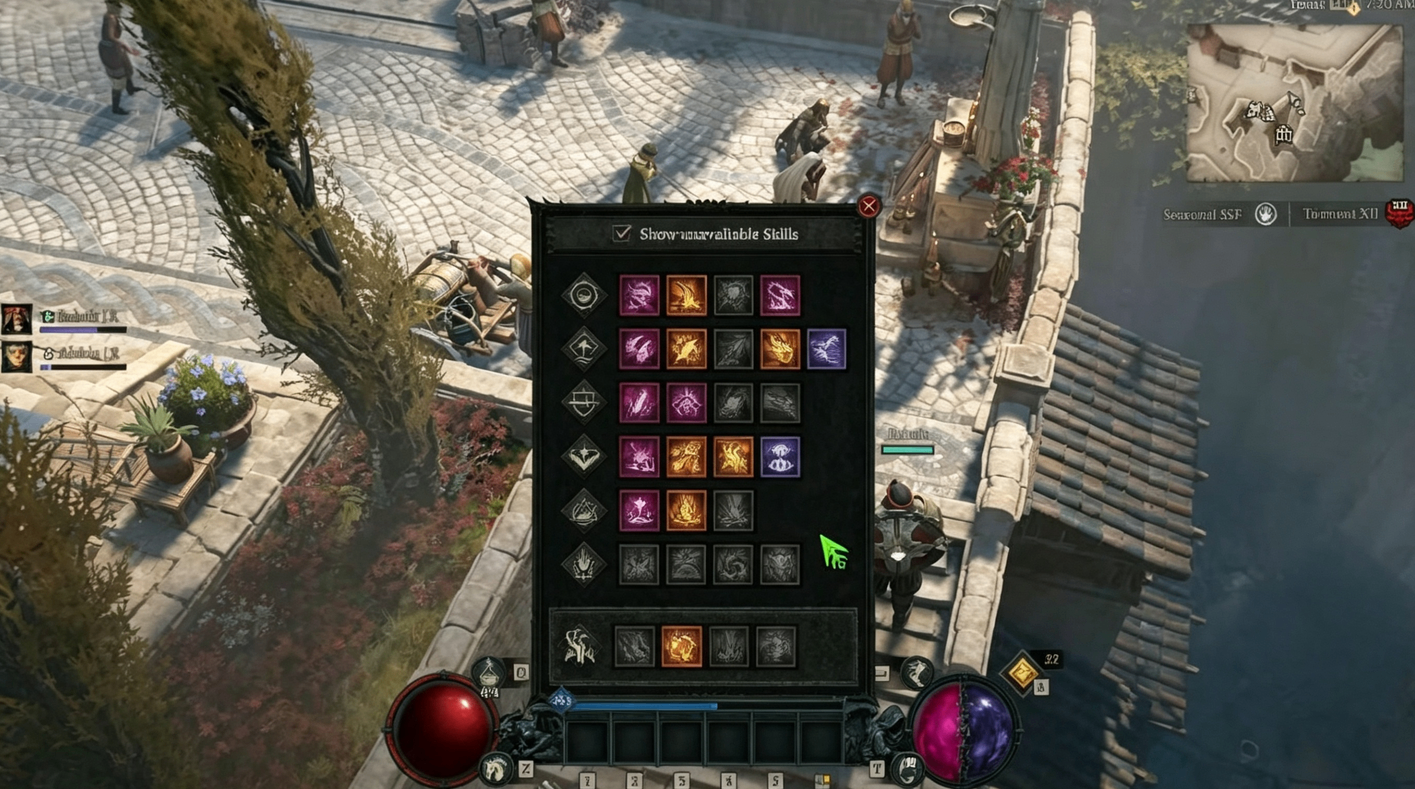
The first decision for any build is choosing the skill you want to max out. In this guide, we'll use Tyrant's Grasp as our example—a demonology hellfire core skill that costs dominance. The Warlock notoriously struggles with dominance generation, so our first challenge is solving that resource problem.
Key insight: Before committing to a skill, check its keywords. Tyrant's Grasp is an Arc Fiend, Core, Demonology, Hellfire, and Greater Demon skill—these keywords unlock all future synergies.
Step 2: Solve the Resource Problem
Right now, you can spam a couple of Tyrant's Grasps and then wait for slow dominance regeneration. The only way to get dominance back meaningfully is using Metamorphosis in Demon Form, which gives a basic skill that restores 2 dominance per hit. However, weaving basic attacks between your main skill is awkward and inefficient.
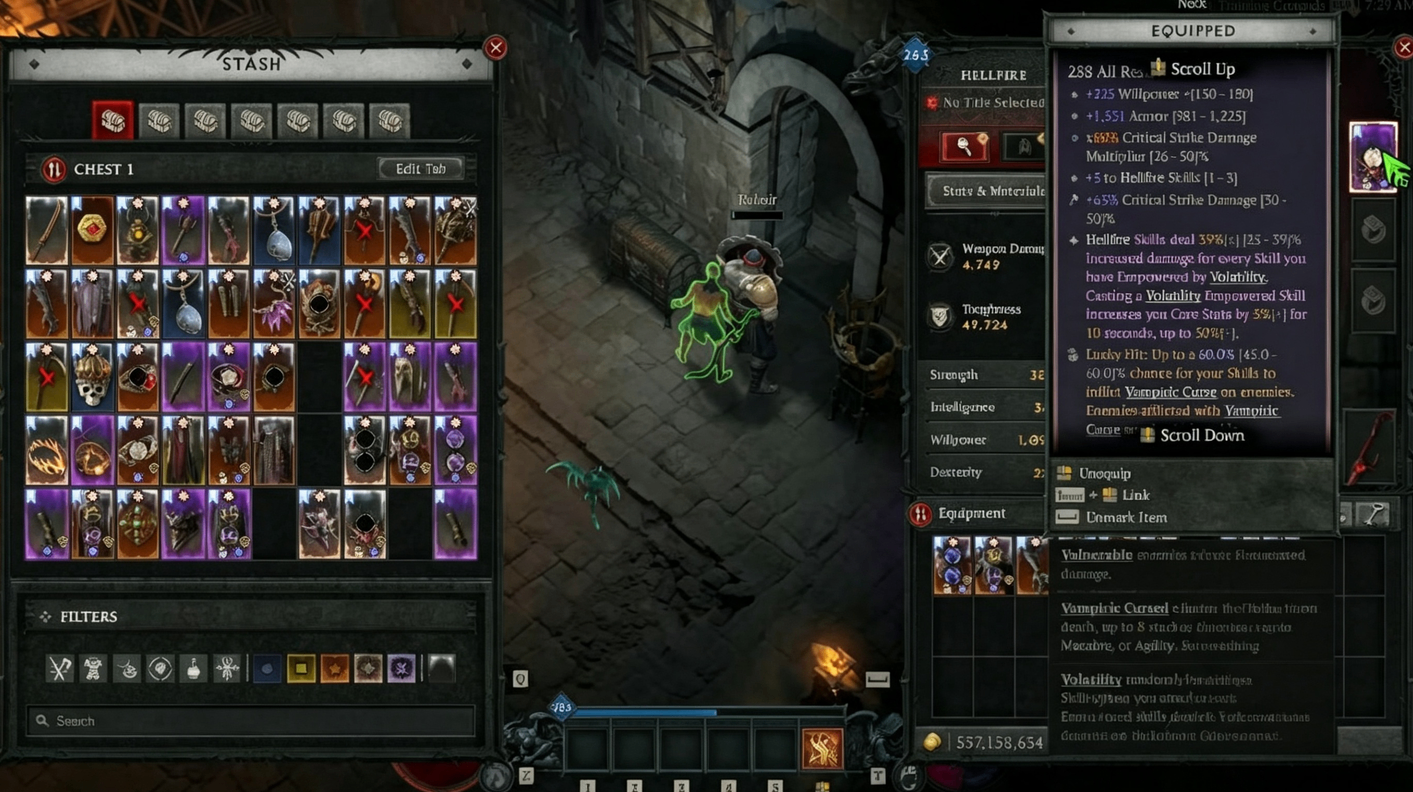
The unique solution: Look for uniques that transform your resource cost. Using Anathema of the Primes, hitting enemies with core skills increases damage they take by up to 156%. More importantly, this weapon converts Tyrant's Grasp (when turned into Demonic Grasp via the skill tree) to cost wrath instead of dominance. Suddenly, we've bypassed the dominance problem entirely.
Resource management trick: Since Demon Form makes us permanently unstoppable, equipping Tybalt's Will gives 50% resource generation while unstoppable—permanently active. This solves our wrath regeneration without needing resource rolls on every gear piece.
Step 3: Select Supporting Uniques
Now we need to maximize our damage engine. Browse the Warlock loot table for items that work with our skill keywords.
| Unique | Effect | Why It Works |
|---|---|---|
| Molo Speeding Flame | Hellfire skills deal 30% increased damage per volatility-empowered skill | With 6 hellfire skills, that's 180% bonus plus core stat scaling |
| Seat of Horizontology | 0.75% increased damage per wrath, 0.25% reduced damage per dominance | Alternative option with defensive benefits |
| Hecatan's Chasm | Tyrant's Grasp deals 120% increased damage and summons 5 additional hands | Massive damage multiplier—currently throwing 3 hands, now 8 |
The Molo Speeding Flame edges out the Seat of Horizontology because it provides more raw damage and has insane core stat (Willpower) scaling.
Step 4: Build the Full Skill Engine
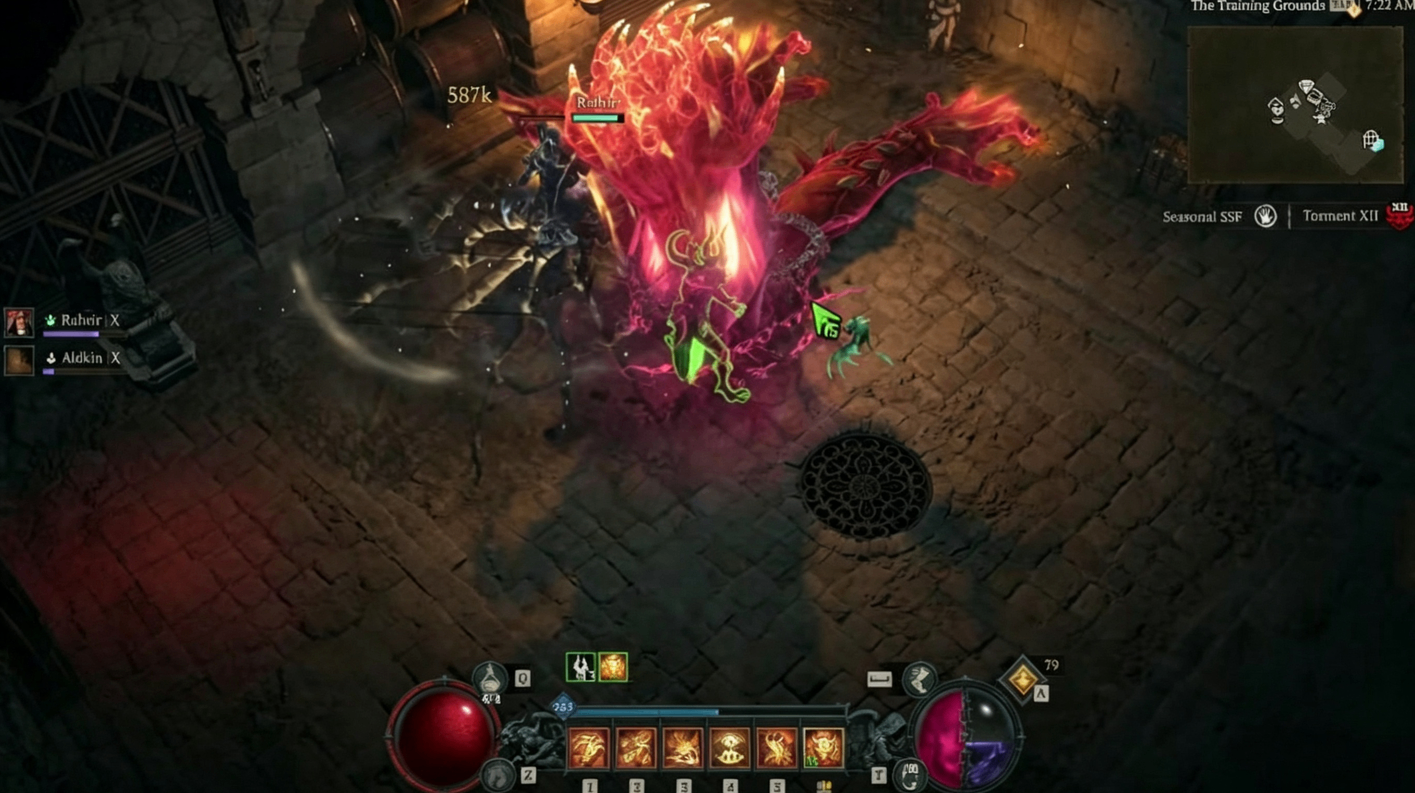
We need six hellfire skills to maximize the Molo Speeding Flame bonus. The goal is to have supporting skills that require minimal button presses, allowing us to spam Tyrant's Grasp.
Duration skills to activate once every 10 seconds:
Blazing Scream (Hellfire version): Orbits around you, deals more damage the more enemies it hits and with movement speed
Bombardment (Endless Barrage version): Slams demons randomly around you for 10 seconds
Profane Sentinel (Vanguard Shard version): Summons an eye that follows you, making enemies vulnerable for 10 seconds
Passive support skills:
Sigil of Chaos: Grants volatility to all skills; every volatility-empowered cast triggers explosions
Metamorphosis: Grants volatility while in Demon Form; each hellfire skill increases hellfire damage
The rotation: Tap Blazing Scream → Tap Bombardment → Tap Sentinel → Spam Tyrant's Grasp. Reapply every 10 seconds.
Step 5: Solve Mobility and Defense
Walking around in Demon Form is awkward. Footfall of the Waning World transforms your evade into Nether Step—a dash that provides damage reduction and movement speed. With boots that have maximum evade charges or attack speed reducing evade cooldown, you can dash constantly.
Defensive layers:
Dark Prison (via Nagru rune combo): Provides fortify, which gives bonus healing and damage reduction
Demon Form damage reduction (aspect): Grants 20% damage reduction + additional 1% for 5 seconds when taking fire damage (we're burning ourselves with Metamorphosis)
Chest and helmet: Full defensive pieces with Willpower, max life, armor, and resistance
Step 6: Gear Crafting Priorities
Weapon (Anathema of the Primes):
Stats: Maximum life, weapon damage
Multiplier: Critical strike damage (or all damage if budget-limited)
Temper: Attack speed or critical strike chance
Helmet & Chest (Defensive):
Stats: Maximum life, armor, resistance
Tempers: Maximum life (goes up to 3,000 vs. 2,750 on natural rolls)
Aspect: Demon Form damage reduction (not fortified—we're burning ourselves)
Gloves & Rings (Offensive):
Stats: Critical strike chance (target 40-50%), attack speed, critical damage, vulnerable damage
Important: Mix different multipliers—critical damage and vulnerable damage multiply together, while same multipliers are additive
The Tybalt's Will Pants:
Stats: Maximum life, armor, resistance
Temper: Maximum life (more life = more Metamorphosis damage)
Boots (Footfall):
Stats: Maximum life, movement speed
Aspect: Profane Sentinel ranks (or hellfire/tyrant's grasp ranks)
Ring (Hecatan's Chasm):
Ideal stats: Ranks to Tyrant's Grasp, attack speed, crit chance, crit damage
Avoid: If you use a Ring of Starless Skies instead, you lose 70% potential bonus damage from dominance scaling
Step 7: Soul Shard Selection
Since we're playing a hellfire build:
Hellfire Soul Shard: Boosts hellfire skills
Vanguard Shard: Profane Sentinel gains bonus sentinel; Tyrant's Grasp gets more hands
Inferno Fragment: While volatile in Demon Form, hellfire skills emanate damage outward—perfect for spamming Tyrant's Grasp while pulling enemies in
Step 8: Paragon Board Strategy
Golden rule: Reach every legendary node before activating a single glyph. Path efficiently and choose boards that complement your damage engine.
Board 1: Dynamism (choose first because stat requirements increase with each board)
Legendary: Demonology skills deal increased damage equal to 3% of your current dominance
Glyph: Death Aura (335% bonus to rare nodes at level 125, plus elemental resistances)
Exit: Through the bottom for maximum life nodes
Board 2: Demonic Speculum
Provides 4% max life twice, critical strike chance, resistance, cooldown reduction
Contains large Willpower clusters
Glyph: Demonologist (9.4% increased demonology damage; gain increased damage while a Greater Demon is summoned)
Board 3: Fathomless
Another large Willpower cluster
Provides max life and healing received
Exit efficiently to minimize point investment
Board 4: Greater Hex
Last board for damage reduction
Glyph: Hellforge (intelligence scaling for hellfire skill damage; volatility-empowered skills deal additional damage)
Final glyph placement: Fill remaining points into rare nodes—always prioritize Willpower, maximum life, and resistance nodes. The Eliminator glyph works well with remaining Willpower scaling.
Step 9: Set Items
Abbott's Flesh (2-piece): Demon Form stacks grant bonus damage and life; hellfire skills deal more damage
Seal of the Diamond Mind (3-piece): Damage reduction and 200% bonus damage to sigil skills
Total skill ranks: 53 across demonology and hellfire skills—this is where the real damage scaling happens.
Step 10: Mercenary Choice
Rahier: Bonus resistance to all elements and bonus damage
Altkin: Reduces damage enemies deal to you (bonus weakening on top of existing effects)
Final Build Check
Defenses: High armor, capped resistances (prioritize fire and lightning), physical resistance
Gems: Rubies for fire resistance; Topazes for lightning resistance
Resource: Infinite wrath through Tybalt's Will + permanent unstoppable from Demon Form
Playstyle:
Activate Demon Form
Cast Blazing Scream, Bombardment, and Profane Sentinel (every 10 seconds)
Spam Tyrant's Grasp while dashing with evade
Sigil of Chaos explodes everything around you
Troubleshooting Tips
| Problem | Solution |
|---|---|
| Resource running out | Check Tybalt's Will; ensure you're permanently unstoppable |
| Not enough critical strike chance | Masterwork gloves and rings for crit chance; target 40-50% |
| Dying too fast | Prioritize maximum life tempers; check resistances |
| Glyph not activating | Reach legendary node before socketing glyph |
| Damage feels low | Verify all 6 hellfire skills are volatility-empowered |
Conclusion: You've now built a broken Tyrant's Grasp Warlock from scratch—understanding every decision from skill selection to paragon pathing. Apply this same step-by-step approach to any future build you want to create. Identify the core skill, solve resources with uniques, build supporting skills around duration-based synergies, stack multipliers effectively, and always prioritize defense. If you want to skip the grind, check for diablo 4 max roll items for sale at MMOEXP. Happy crafting!


![[Carry Run] 100K Obducite (Need to pick by yourself)](https://assets.mmoexp.com/images/202603/f0a58fe810e59a7f689a15954c2507518b5cc3f5.png)