
Summary:
The upcoming Grow a Garden 2 Harvest Moon Part 3 update introduces a new Moon Machine, pet mutations, crafting content, new pets, and several powerful farming strategies. This guide explains the leaked mechanics, the best fruits for Harvest Owl requests, Rainbow Sandworm performance, Anubis leveling methods, and the setups players should prepare before the event arrives, including how Grow a Garden 2 Items can support efficient event preparation.

1. Harvest Moon Part 3: What Players Should Prepare For
The Harvest Moon Part 3 update is shaping up to be one of the most important events for players who focus on pet progression, mutations, cooldowns, and efficient fruit farming.
The biggest addition is the Moon Machine, which appears to work similarly to the Inferno Ritual. Players place a pet inside the machine and wait for it to receive a special mutation.
Mutation time is expected to depend on pet rarity. Common pets may require roughly 30 minutes, while extremely rare pets can take considerably longer. Players should therefore prepare their strongest pets before the event begins instead of waiting until the machine becomes available.
2. Harvest Owl Fruit Traits: Use Multi-Trait Fruits
One of the most useful changes involves the Harvest Owl NPC.
The Owl's fruit requests now cover several different traits:
· Berry
· Fruit
· Flower
· Vegetable
· Sweet
· Tropical
· Prickly
· Woody
· Leafy
· Stalky
Instead of collecting ten different plants individually, players can save time by using fruits with multiple traits.
Best Option: Asterisk
The Asterisk is particularly valuable because it reportedly provides nine of the required traits, missing only Tropical.
The downside is its extremely low availability, with the plant coming from a Gem Chest at around a 1% chance.
If you own an Asterisk, keep it rather than casually selling or using it. It can dramatically simplify Harvest Owl requests.
Other Useful Choices
Pomegranate provides five relevant traits, while Speargrass provides four. These are much more practical alternatives for players who do not have an Asterisk.
3. Moon Machine: How Pet Mutation May Work
The Moon Machine is one of the most interesting pieces of upcoming content.
Its basic concept appears straightforward:
Choose a pet → place it into the Moon Machine → provide the required fuel → wait for the mutation.
The leaked system resembles the Inferno Ritual, including different processing times based on pet rarity.
This means players should avoid putting valuable pets into the machine without understanding the final mutation mechanics.
Preparation Tip
Before the event starts:
1. Level your strongest pets.
2. Collect potential fuel materials.
3. Keep spare pets available.
4. Avoid selling rare pets.
5. Save event-related resources.
If mutation results are random, having multiple eligible pets will give you more opportunities to chase desirable outcomes.
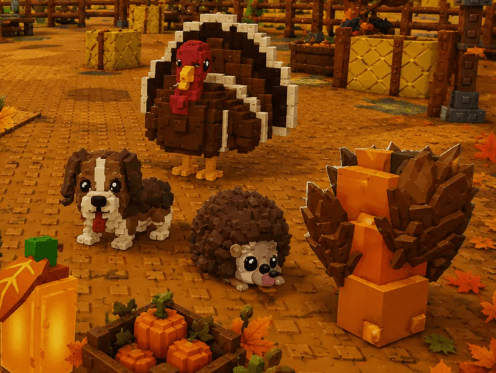
4. Rainbow Sandworm: Is It Worth Using?
The Rainbow Sandworm is another major addition players should understand.
It can be obtained through the Season 7 Pass at Level 47 and has an interesting cooldown-focused ability.
Approximately every 20 minutes, the Sandworm can travel toward another random pet and advance that pet's cooldown by five minutes. It can also apply Sandy mutation to a nearby fruit.
The additional mutation effect gives Sandy-mutated fruit a chance to transfer another mutation to fruits in the garden when sold.
The Problem
Rainbow Sandworm only advances one pet at a time.
That makes it less efficient than setups that can affect multiple pets simultaneously.
Players testing six Mimic Octopus with a Ferret may find the Sandworm useful, but it should not automatically replace stronger cooldown-focused pets.
5. The Anubis Leveling Method Still Works
The Anubis method remains one of the most useful strategies for accelerating pet progression.
A normal Anubis is still effective when combined with a properly optimized Mimic Octopus, particularly when the Mimic reaches a short cooldown.
Rainbow Anubis is stronger, but players without one do not need to abandon the strategy.
Important Detail
Pet mutations do not appear to determine the effectiveness of the Anubis ability.
The ability focuses on a single fruit, so spending excessive resources trying to mutate the Anubis itself is unnecessary for this specific leveling strategy.
For efficient progression, focus on reducing cooldowns and improving the overall garden setup.
6. T-Rex and Tiger for Mutation Farming
Mutation farming becomes much easier when players use pets capable of spreading mutations across multiple fruits.
T-Rex is particularly useful because it can spread effects across multiple fruits, making it a strong alternative to relying solely on Wise Owl.
Tiger can also contribute to mutation-focused setups.
This creates a useful progression loop:
Generate mutations → spread mutations → improve valuable fruits → use those fruits for further progression.
Players should prioritize pets that affect multiple targets when building a mutation farming garden.
7. Wise Owl vs. T-Rex
Wise Owl remains useful, but its value depends heavily on the player's objective.
For pure pet leveling, the progression speed may feel slow. If leveling a pet by one level takes several minutes, Wise Owl may not be the fastest solution.
For mutation-related activities, however, its experience-related utility can still be valuable.
If your primary goal is mass mutation farming, T-Rex may provide better overall value because of its ability to affect multiple fruits.
8. Desert Tortoise: The AFK Farming Option
The Desert Tortoise is worth keeping for players who enjoy AFK farming.
Its ability can help generate sprinklers, which remain useful resources even if the current event does not heavily depend on them.
A practical AFK setup can combine:
Desert Tortoise + Mimic Octopus + long farming session
Leave the garden running for an extended period and accumulate sprinklers rather than manually farming every resource.
This is particularly useful for players preparing for future events where sprinklers could become significantly more valuable.
9. Arctic Fox vs. Red Panda
When deciding between these two pets, Arctic Fox is generally the stronger option for shop-focused progression.
Arctic Fox can restock the entire shop, while Red Panda only randomly restocks one seed or piece of gear.
Red Panda is therefore more accessible and cheaper for players who lack stronger pets, but Arctic Fox has a much higher ceiling when your setup can take advantage of repeated shop refreshes.
Simple Recommendation
Use Arctic Fox if you have an optimized economy setup.
Use Red Panda if you need a cheaper restocking option.
10. What to Do Before Harvest Moon Part 3
Players should prepare their gardens before the update rather than spending everything immediately.
Priority Checklist
Save Moon Coins: They are expected to be important for event systems and crafting.
Level Pets: The Moon Machine may require high-level pets.
Keep Multi-Trait Fruits: Asterisk, Pomegranate, and Speargrass can simplify Harvest Owl requests.
Prepare Rare Pets: Don't sell pets that could become useful mutation candidates.
Build Cooldown Setups: Mimic Octopus and other cooldown-focused pets can improve multiple farming methods.
Stockpile Sprinklers: Desert Tortoise provides a convenient way to build reserves.
Maintain Mutation Pets: T-Rex and Tiger can help accelerate mutation farming.

Final Thoughts
Grow a Garden 2 Harvest Moon Part 3 could significantly change the current pet and mutation meta. The Moon Machine introduces another layer of pet progression, while Harvest Owl's expanded fruit traits make multi-trait plants more valuable than ever.
For immediate preparation, focus on pet leveling, cooldown reduction, mutation spreading, and resource preservation. Keep an Asterisk if you are lucky enough to own one, use Pomegranate and Speargrass as practical alternatives, and continue using Anubis with Mimic Octopus for efficient pet progression. Players who want to accelerate their preparation can also consider buy Grow a Garden 2 Items to support their event farming setup.
The most important rule is simple: don't spend every rare resource before the event starts. New mutations, crafting recipes, and pets can quickly change which items are valuable. Players who enter Harvest Moon Part 3 with stocked resources and flexible pet setups will have a major advantage when the new meta develops.