Summary:
Path of Exile 2 players looking for the ultimate fast-mapping experience should take a serious look at the Gemling Twister build. This high-budget setup combines extreme attack speed, powerful Twister scaling, permanent Frenzy Charge generation, and a massive Energy Shield pool to create a character designed around one simple idea: move faster, attack faster, POE 2 Currency, and kill everything before it can react.
Why Gemling Is So Strong for Twister
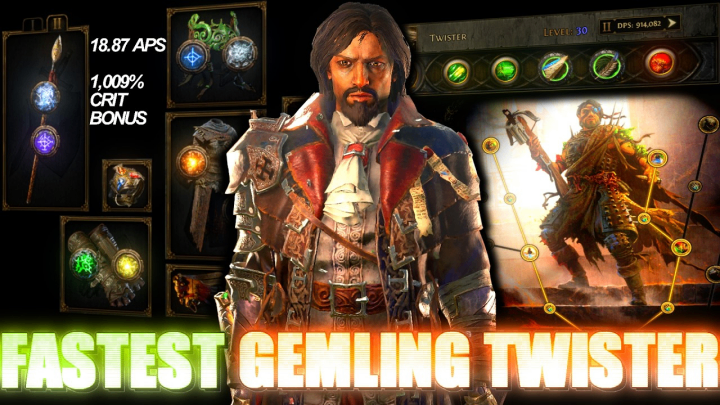
The main reason to play Gemling with Twister is speed. The build is designed to maximize attack speed and projectile speed rather than simply stacking as much damage as possible. With the right setup, the character can reach around 16.67 attacks per second without buffs and approximately 18.87 attacks per second with buffs.
That level of speed completely changes how the build feels. Twister already provides excellent clear potential, but combining it with extremely fast movement and attack speed allows the Gemling to fly through maps while continuously casting and moving.
The goal is not necessarily to achieve the largest tooltip damage possible. Instead, the build aims to reach the point where enemies already die easily and additional damage becomes less valuable than faster movement and faster screen clearing.
Twister and Spinning Slash Synergy
The core interaction revolves around Twister and Spinning Slash. Spinning Slash provides an important attack-speed scaling mechanic, while Twister benefits heavily from additional projectile speed and repeated attacks.
A high-quality Spinning Slash can provide a substantial boost to the build, and additional global quality modifiers can push the scaling even further. The result is a character that feels dramatically faster than a conventional Gemling setup.
Twister also benefits from repeated projectiles. Frenzy Charges are particularly valuable because they allow the build to generate additional repetitions, increasing the number of projectiles and significantly improving clear speed.
However, repeated attacks deal reduced damage compared with the original attack. This means the build should not be judged simply by looking at individual projectile numbers. The real strength comes from the combination of multiple projectiles, attack speed, projectile speed, and constant movement.
How the Build Generates Frenzy Charges
One of the most important parts of this setup is reliable Frenzy Charge generation.
Instead of relying heavily on Combat Frenzy or complicated Trinity setups, the build focuses on Armor Break, Resonance, and other consistent charge-generation mechanics. Armor Break can provide Endurance Charges when an enemy's armor is completely broken, and Resonance can convert those charges into Frenzy Charges.
This creates a surprisingly reliable system during mapping. As long as there are enemies to hit, the character can continuously generate charges without needing to constantly worry about preserving them.
This is one reason the build can avoid investing heavily into expensive mechanics designed specifically to prevent Frenzy Charges from expiring. Rather than trying to hold charges forever, the character simply generates them again and again.
Why Energy Shield and Chaos Inoculation Matter
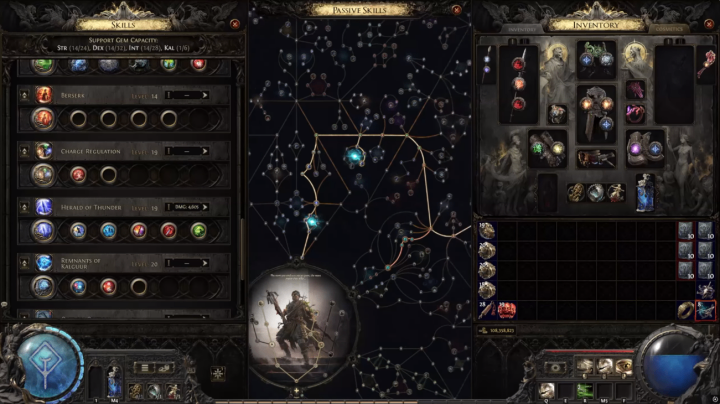
The recommended defensive direction is a pure Energy Shield setup with Chaos Inoculation (CI) rather than a hybrid Energy Shield and Evasion configuration.
The reasoning is straightforward: this build is already designed around speed. A hybrid setup can create additional defensive requirements without providing enough practical benefit for the playstyle. Pure Energy Shield allows the character to focus more heavily on survivability while maintaining the speed-oriented identity of the build.
With around 10,000+ Energy Shield, the character can have a strong defensive buffer while remaining extremely mobile. Chaos Inoculation also provides Chaos immunity, which frees up other equipment and passive choices.
The build can additionally benefit from strong chest defenses, Energy Shield scaling, and life regeneration where appropriate to support its resource mechanics.
Projectile Speed Is a Major Damage Multiplier
Projectile speed is not just a quality-of-life stat for this build. It can directly contribute to its damage potential.
The setup can reach around 339 projectile speed, depending on gear and support choices. Removing certain projectile-speed bonuses can dramatically reduce that number, showing how important the stat is to the overall configuration.
This is why the build prioritizes support gems and passive choices that increase projectile speed while also converting that investment into additional damage.
The philosophy is simple: if Twister already kills enemies reliably, increasing projectile speed can improve both the feel of the build and its overall clear efficiency.
Why the Build Avoids Trinity
Although Trinity can provide useful skill speed, balancing its elemental requirements can force players into a chain of additional choices.
Once Trinity becomes the foundation, players may feel pressured to build around elemental damage, Combat Frenzy, elemental conversion, and specific equipment choices. That can ultimately make the build more complicated without delivering the same speed-focused result.
The Gemling Twister setup instead prioritizes straightforward scaling: attack speed, projectile speed, critical strikes, Frenzy Charges, and consistent Twister damage.
This approach also makes it easier to use other mechanics that support the build without having to constantly balance elemental damage types.
Support Gems and Key Scaling Choices
Several support gems are especially valuable for maximizing this playstyle. Projectile Speed is one of the most important because it can provide both speed and damage benefits. Additional attack-speed supports further increase the character's attacks per second.
Accuracy can also become surprisingly valuable. With enough accuracy, passive bonuses can convert accuracy investment into additional attack speed, providing another way to push the build toward its maximum speed.
Critical strike scaling is another major component. The build can use powerful critical-focused mechanics while taking advantage of Twister's repeated attacks and additional projectiles.
For players trying to maximize clear speed, every small improvement matters because the build is designed around stacking many different speed multipliers rather than relying on one massive damage mechanic.
Is Low Life Worth Using?
A low-life version can provide significantly more damage, but it comes with an important trade-off: you sacrifice some of the speed and defensive consistency that make the Gemling Twister setup attractive.
For players who only care about maximum damage, low life can be considered. However, the faster version of the build can already kill enemies extremely quickly.
That makes movement and clear speed more valuable in many mapping situations. If the character already destroys enemies with hundreds of thousands of damage, doubling the damage may have little practical impact compared with moving through the map significantly faster.
The Real Goal: Maximum Clear Speed
Ultimately, the Gemling Twister build is not about creating the biggest possible damage number. It is about reaching a comfortable damage threshold and then investing everything else into speed.
With extremely high attack speed, fast projectile travel, reliable Frenzy Charges, strong Energy Shield defenses, cheap Path of Exile 2 Currency, and constant movement, the build turns mapping into a high-speed experience.
Players who want maximum boss damage may prefer a different archetype, such as an Abyssal Lich-focused setup. But for those who want to race through maps, destroy entire packs, and maintain an extremely fast playstyle, Gemling Twister is one of the most interesting PoE 2 builds to explore.
The biggest lesson is simple: once your damage is already high enough to kill everything, stop chasing unnecessary damage. Invest in speed, keep moving, and let Twister do the rest.