
Summary:
WARDOGS base building has changed dramatically with new construction techniques that make defensive structures cheaper, taller, and more resistant to mortar attacks. From Bremer walls to floating roofs and artillery shelters, WARDOGS Dollar, these methods can completely reshape your defensive builds.
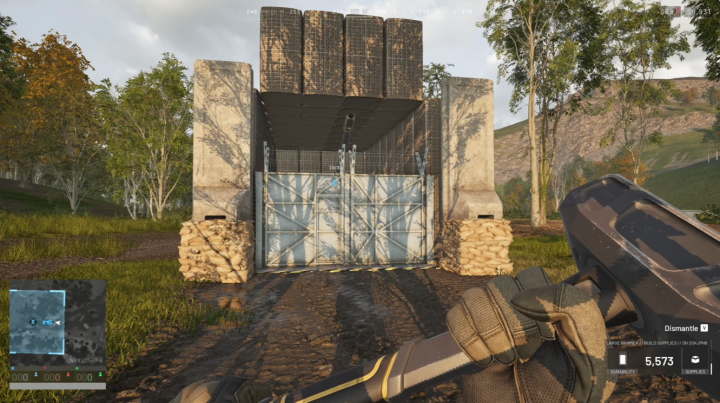
Bremer Walls Are Changing Base Design
One of the biggest discoveries in WARDOGS building is the interaction between Hesco and Bremer walls. By placing a single Hesco wall first and then building a Bremer wall on top, players can continue snapping additional Bremer walls to the previous section.
The important part is that each Bremer wall effectively receives a free sandbag block underneath it. This allows a Bremer wall structure to reach approximately four blocks in height, comparable to stacking two tall Hesco structures.
This could make traditional double-Hesco designs much less attractive. Existing bases may need to be redesigned around Bremer walls because they provide both defensive strength and significant resource savings.
Bremer Walls Save Building Resources
Resource efficiency is another major advantage. A Bremer wall costs only 10 building resources, while a Hesco block wall costs approximately 46 resources.
For example, a four-block-high and four-block-wide Bremer structure can require around 40 resources. A comparable four-high, four-wide Hesco setup using stacked walls would require approximately 92 resources.
That difference becomes extremely important when constructing large bases, artillery positions, AA defenses, or reinforced bunkers. Instead of spending huge amounts of materials on defensive walls, players can potentially build larger structures with the same resource budget.
The tested C4 resistance is also important. The Bremer wall requires seven C4 charges to destroy, whether the explosives are placed on the concrete section or the sandbags beneath it.
Floating Roofs and Bunker Scaffolding
Another major building technique involves using bunkers as temporary scaffolding. Players can build structures on top of bunkers, construct the desired roof, and then destroy the bunkers underneath.
When performed in the correct order, the roof sections can remain in place even after the supporting bunkers are removed. This creates what appears to be a floating roof or ceiling.
According to the developer comment discussed in the source material, this construction method was considered acceptable rather than an exploit. However, players should always pay attention to future patches or developer clarification because building mechanics can change.
The technique is particularly useful for creating protected artillery and anti-aircraft positions.
How to Build an Artillery Garage
An artillery garage is one of the most interesting applications of these construction mechanics.
Start by placing two bunkers because artillery requires enough vertical space to accommodate the long barrel. Build defensive walls around the sides and rear, then construct upward until you have sufficient height.
The roof can be created by placing wall sections across the top. Once the roof is complete, the bunkers used as scaffolding can be destroyed from below, leaving the completed ceiling in place.
The result is a protected artillery position that can limit enemy visibility while still allowing the weapon to fire through an opening.
For an APC shelter, less vertical space may be necessary because the vehicle does not require the same barrel elevation as artillery.
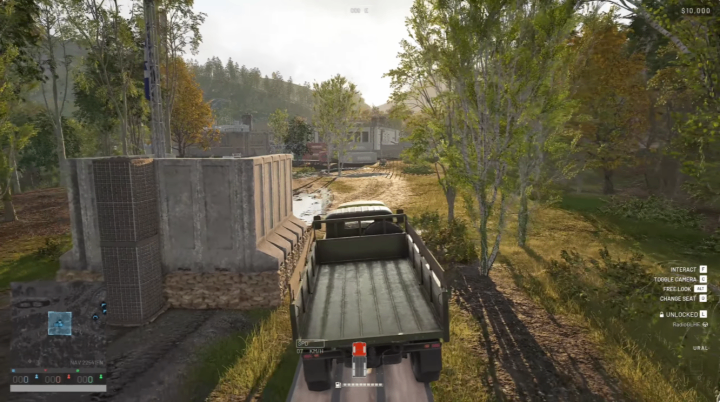
Protecting Your Artillery From Mortars
The main purpose of this type of garage is protection from enemy mortar fire.
The surrounding walls can reduce the amount of exposed structure and potentially make the artillery position harder to identify. Adding hedgehogs to the roof may also provide additional protection against incoming mortar shells, although this specific interaction should be tested carefully rather than treated as guaranteed.
There are some important limitations.
If the artillery barrel touches the ceiling, it can automatically drop downward. If the barrel reaches the front gate, it can also become stuck. The builder therefore needs to leave enough room for the artillery to elevate and move without contacting the structure.
Testing showed a practical firing range of roughly 1,800 to 2,600 meters, depending on the exact barrel position and garage configuration. Adjusting the artillery farther forward can provide additional elevation, but more of the weapon becomes exposed.
Building a 360-Degree SeaWiz Shelter
The same construction concept can be adapted for a SeaWiz defensive position.
Begin with a bunker and construct Hesco walls around the sides and rear while leaving the front open. Build upward and place another bunker on top to create the required roof height.
Once the roof is completed, remove the bunkers being used as temporary scaffolding. The remaining roof sections can then provide overhead protection while the front stays open.
Finally, remove the front wall that blocks the SeaWiz operator's view. This creates a position with 360-degree visibility, allowing the weapon to maintain a much wider field of view.
The open design does introduce risk, so positioning the shelter in a concealed location such as trees can make the overall setup more difficult to spot.
Important Building Tips
Construction precision is extremely important when using these advanced techniques.
First, try to stand as far away from the construction point as possible while still being able to place the structure. This can help keep the placement indicator from moving unpredictably. If the placement marker disappears, moving slightly closer can bring it back.
Second, pay attention to the construction timing. Releasing the mouse button after the placement flash and clicking again can help maintain a fast building rhythm. Audio cues can also help players recognize the correct timing.
These small details become especially important when constructing large defensive structures where a single misplaced block can affect the entire design.
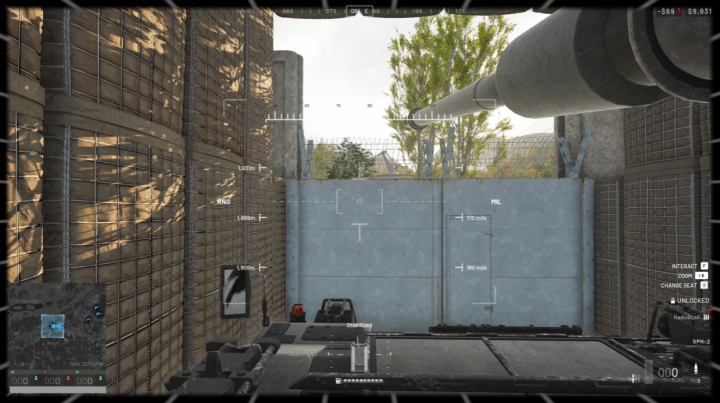
Vehicles Can Still Breach Defensive Walls
Even tall defensive walls aren't completely impenetrable.
Normal vehicles generally cannot simply jump over these structures, but specialized vehicles may have enough capability to get across. Players can also potentially exploit surrounding objects, vehicles, fences, or terrain to create enough elevation for a vehicle to cross the wall.
Because of this, placing important equipment directly against an exterior wall can create unnecessary risks. Leave appropriate space around critical defensive positions and consider how vehicles could approach the structure.
What These Changes Mean for WARDOGS Bases
The combination of cheaper Bremer walls, temporary bunker scaffolding, floating roofs, and specialized shelters opens up many new possibilities for WARDOGS base design.
The biggest change is that older defensive blueprints may no longer be the most resource-efficient option. Bremer walls can provide impressive height while requiring substantially fewer building resources than traditional stacked Hesco structures.
At the same time, artillery and SeaWiz shelters can be designed around specific battlefield requirements rather than simply placing weapons behind basic walls.
Final Thoughts
WARDOGS' building system offers much more depth than simply placing walls around a base. The interaction between bunkers, Hesco walls, Bremer walls, roofs, and weapon positioning allows players to create highly specialized defensive structures.
The most useful techniques discussed here are the Bremer wall stacking method, floating roof construction, protected artillery garage, cheap WARDOGS Dollar, and 360-degree SeaWiz shelter. As players experiment with these designs, future base builds could become significantly more efficient while providing better protection against mortar and vehicle threats.