Weekend Drop -













To reach WarDog Level 100 in WARDOGS Season 2, work toward level 10 in each role, bring all six to 15 for WarDog 90, then take two productive roles to 20.
Start with the infantry loadout below; if you cannot drive or fly reliably, choose the ground-only or infantry-only route.
These are recommended plans based on the published XP curve, with checkpoints for changing activities. Their completion times have not been measured in Season 2.
How WarDog Level 100 Works
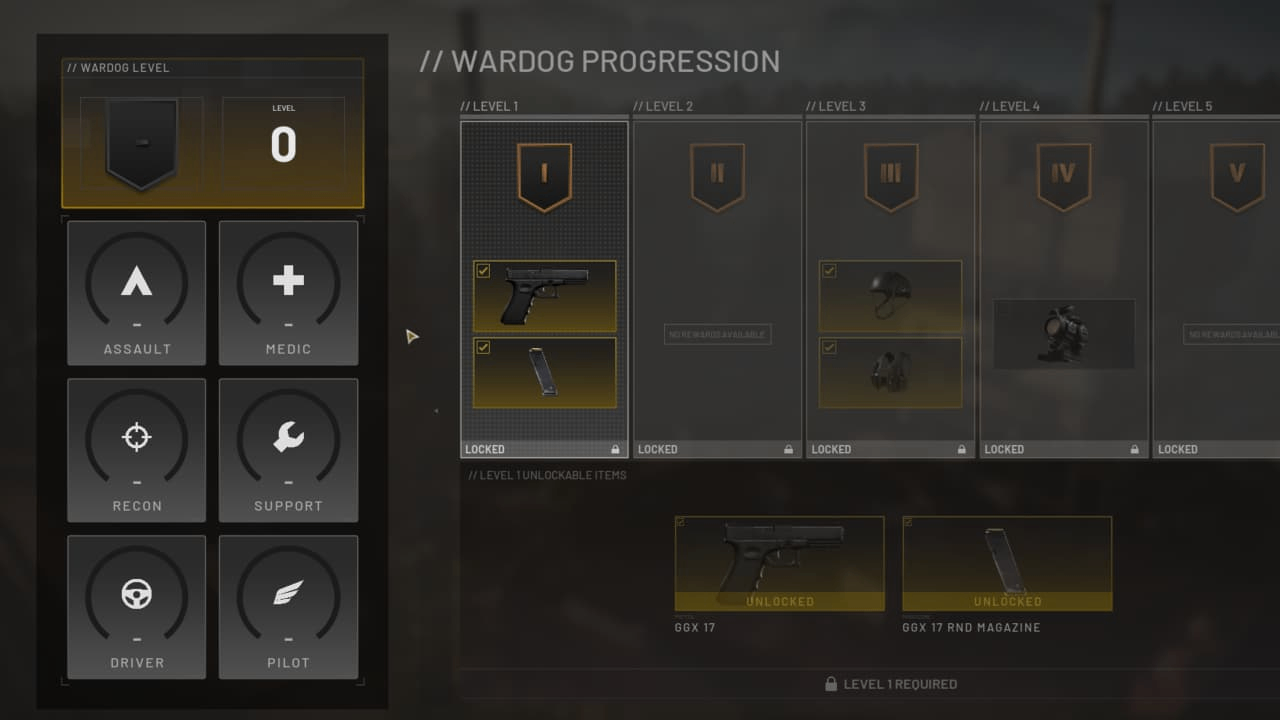
Your WarDog level is the sum of Assault, Medic, Support, Recon, Driver, and Pilot levels. Six roles at 10 give WarDog 60; six at 15 give 90. Adding five levels to two of those roles reaches 100. You do not need a single role at level 100.
The Season 2 cumulative requirement is 25,000 XP for role level 10, 54,750 for 15, and 111,500 for 20. Six tracks at 15 plus two increases to 20 total 442,000 role XP before overshooting.
The 10/15/20 targets make a convenient checkpoint plan using published totals, not a proven minimum-XP allocation. A more even spread, such as four roles at 17 and two at 16, could require less XP; intermediate thresholds have not been checked here.
WarDog 100 matters as an equipment-access milestone: Level 4 protection is community-recorded at that combined level. Reaching it still leaves unlock and deployment costs. Check the current vendor requirement before committing your savings, and remember that role-specific weapons and vehicles require their own track levels.
Your First Match and Checkpoints
For your first WARDOGS deployment, equip the default-unlocked PP-19 Bizon, matching ammunition, bandages, the free Emergency Resuscitator, and binoculars that fit your loadout. Equipping the Bizon still costs cash; retain a replacement-kit budget. Use the six-role plan only if you can already drive and fly reliably.
Combined-Level Checkpoint | Recommended Work | When to Move On |
Opening toward 30 | Raise Medic and Recon toward 10 together, then Assault toward 10 with a rifle and medical gear | Those three tracks are around 10 |
30 toward 60 | Work Support at a supplied FOB, then Driver and Pilot through useful transport, aiming for 10 each | All six tracks are around 10 |
60 toward 90 | Raise each track toward 15, using infantry, FOB work, and transport in separate activity blocks | Six tracks at 15 total 90 |
90 toward 100 | Default to Medic and Support 20 when healing and supplied construction remain productive; use Driver or Pilot instead when transport is working better | Your actual six-role sum reaches 100 |
These checkpoints can span several matches; extra levels count toward later targets. Reassess at each checkpoint or when the activity stops producing useful progress. Reserve Wardogs cash for replacement ammunition and medical supplies before optional attachments.
Use Medic plus Recon when nearby fighting produces reachable casualties. Stay one cover position behind the push. Use the SMG for Medic weapon XP, heal reachable teammates, and mark visible enemies with binoculars between engagements.
Those separate actions advance different tracks during one deployment; SMG combat does not also count toward Assault. If healing opportunities dry up, switch to an assault rifle plus binoculars for Assault and Recon. Neither pairing has a verified speed advantage.
Push Medic to 14 for the Medical Bag when repeated deployments provide reachable patients and you can fund the unlock. If you are waiting for injuries or dying before treating anyone, switch tracks instead of forcing 14. The Defibrillator now requires Medic 22, so exclude the old level-11 rush from your opening plan.
Pick a Route for Your Playstyle
For a returning WARDOGS player unsure about vehicles, start with infantry, then try ground logistics once a requested cargo and its budget are ready. Use the no-flying route if deliveries work; stay infantry-only if they do not. Choose six-role rotation when flying is already dependable.
Route | Concrete Target for 100 | Cumulative Role XP | Choose It When |
Six-role rotation | Four tracks at 15, two at 20 | 442,000 | You can contribute through every role |
No flying | Assault, Medic, Recon, Support, Driver at 20; Pilot at 0 | 557,500 | You can drive, but flying would add repeated losses |
Infantry only | Assault, Medic, Recon, Support at 25; Driver and Pilot at 0 | 826,400 | You want to avoid both vehicle tracks |
The infantry-only example requires about 87% more role XP than the six-role example, but can suit players who gain little XP in vehicles. Any transport levels you earn reduce the infantry work needed.
Solo: Start with Infantry
Join the public infantry push for healing and spotting opportunities; these actions do not require a premade squad.
For an infantry-only route, take those four tracks toward 10 for WarDog 40, then 15 for 60, 20 for 80, and 25 for 100. Build at a supplied, occupied FOB while useful structures remain unfinished.
When supplies run out or no useful builds remain, use an accessible shotgun or LMG for Support combat, or switch tracks. Do not wait at an empty FOB for supplies.
If you drive but do not fly, add Driver to those checkpoints: five tracks at 10 give 50, at 15 give 75, and at 20 give 100.
Start logistics only after identifying a friendly destination that needs supplies. This removes flying from the plan without forcing four infantry tracks all the way to 25.
Squad: Rotate Transport and FOB Jobs
For a coordinated group, agree on a receiving FOB and assign transport and construction jobs before departure. A driver delivers cargo; a builder handles the FOB; an infantry player provides security and medical support.
Rotate these jobs at the role checkpoints so one person does not remain on Driver while everyone else advances Support.
From six roles at 15, Driver 20 and Pilot 20 also reach 100. Skip Pilot for the current match if you cannot identify a viable drop-off before deploying, or repeated losses require replacements without completed deliveries. Switch to ground or infantry work; any Pilot levels already earned still count.
Run a Complete Logistics Cycle
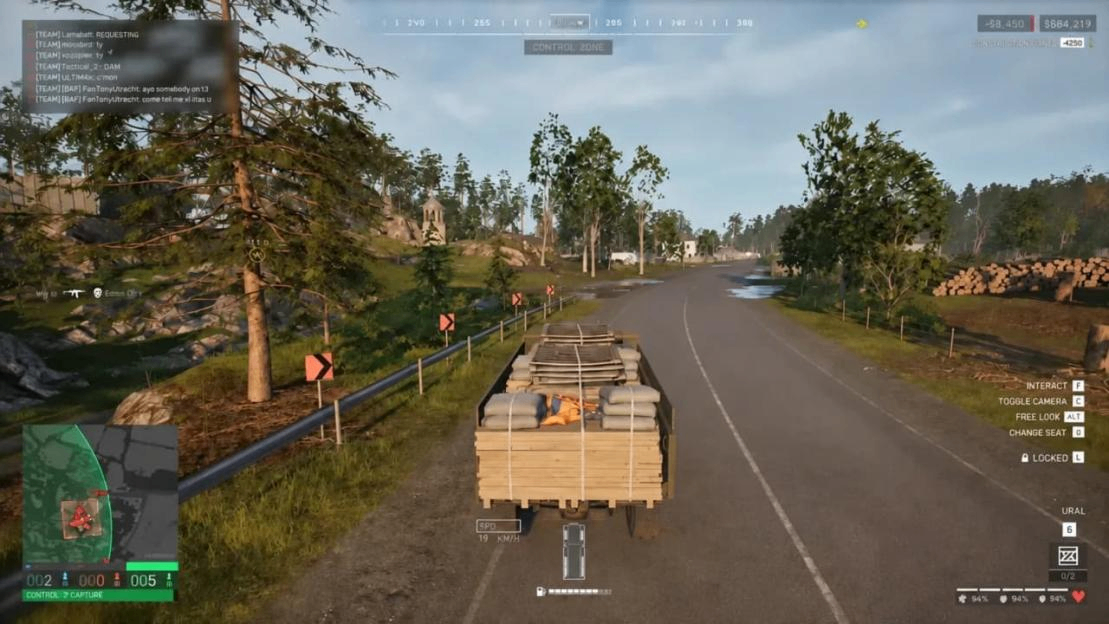
For dedicated pallet runs in WARDOGS, first meet any level gate and unlock fee for your chosen cargo and obtain a compatible vehicle. Until then, follow the infantry checkpoints. Pallets suit straightforward FOB supply; crates offer cargo flexibility or fit vehicles without pallet capacity.
Pallet | Combined WarDog Level | One-Time Unlock Fee |
Mechanical Supply | 5 | $10,000 |
Ammo Supply | 9 | $25,000 |
Fuel Supply | 16 | $50,000 |
Budget Wardogs cash for the unlock, vehicle, outbound cargo, and a replacement infantry kit. If that total exceeds your balance, continue infantry play rather than funding an incomplete run.
1. Identify a friendly FOB inside the Control Zone and ask which supplies it needs. Solo drivers can handle the unloading themselves if the destination is safe.
2. At HQ, enter a cargo-capable vehicle and open its logistics menu. Select compatible pallets or filled crates and confirm the load before leaving. Check current cargo capacity rather than assuming every truck accepts pallets.
3. Reach the FOB's supply radius before deploying the cargo. For pallets, use the available transfer interaction to move supplies into the FOB. For crates, allow time to move the contents manually.
4. Confirm delivery credit and that supplies reached the FOB. A pallet dropped outside the usable radius is a delivery mistake; do not assume it can be picked up again.
5. Return to HQ in the same vehicle when safe, check the return credit, reload, and repeat while the destination still needs supplies. If the FOB falls or the route becomes an ambush, choose another destination before loading again.
Build after a drop when raising Support is your goal; it pauses the driving loop. For dedicated Driver progress, prioritize transport cycles. Repairs feed Driver or Pilot according to vehicle type.
Crates, Pallets, and Streaks
Season 2 base pallet XP is 500 from ground vehicles and 400 otherwise. Ground crates list 200 XP for small and 400 for large, scaling with their contents. Compare the whole loading, delivery, and return cycle: vehicle capacity and manual unloading can outweigh a larger per-item award.
Consecutive Delivery Type | Published XP Increment | Streak Cap |
Crate | +50 | 10 |
Pallet | +100 | 10 |
Player | +5 | 25 |
Return trip | +25 | 10 |
The crate and pallet increments already include the Control Zone adjustment; do not multiply them again. Streaks count their named delivery type, so ten pallets need not mean ten trips.
Each additional eligible pallet raises the streak component by 100 XP until its cap. A displayed 500 base plus 200 streak equals 700, with return credit separate; this example does not establish the starting counter.
Reset triggers and aircraft return-streak eligibility remain unclear. Check actual credits after a dismount, vehicle change, or death. Preserve the vehicle and avoid deliberate respawns when planning repeat runs, without assuming a specific reset rule.
If travel delays or repeated losses drain Wardogs cash and stall XP, return to infantry. Pallets transfer directly into a nearby FOB, making them useful with limited unloading help; crates need manual handling. Use crates when the cargo or vehicle requires them, or your group can unload efficiently.
Apply the Season 2 Corrections
When following these WARDOGS routes, keep demolition in the Assault block: destroying buildables and IED/C4 now feed Assault. Artillery feeds Driver, and vehicle repairs no longer belong to Support. Spotting remains useful alongside another job, though its rewards are lower than in Season 1 and depend on target value.
Support construction also needs a fresh judgment because the medium hammer contributes less per swing. Favor supplied, useful work over extending a building session simply because an older routine recommended it.
Lonestar has Season 2 XP incentives, but no published rate establishes that joining it beats every other faction's available opportunities.
Season 1 Progress and Completion Time
Season 2 is billed as WARDOGS' first progression wipe. Plan for seasonal role levels and the combined level to restart, rather than applying the lower XP curve to your old Season 1 total. A full paid-unlock carryover breakdown is not established here, so check the new vendor access before relying on an old weapon or vehicle unlock.
Before the transition, prioritize practicing the jobs you intend to repeat. Chasing one more Season 1 role level is not a way to skip the new seasonal ladder.
The announced maintenance window is October 15, 08:00 to 09:30 UTC; use Season 2 rewards and requirements after the update is active, without assuming the scheduled finish proves servers are available.
There is no reliable Season 2 match count for reaching 100. Match length, failed deployments, and your chosen allocation all change the result.