Summary
This guide breaks down the fully functional free-to-play Sage Whirlwind build after three days of progression in Season 20, covering damage output, defensive balancing, core affliction mechanics, optimal farming rotations, and planned late-game gear upgrades. Players collecting Torchlight: Infinite Flame Elementium should pay close attention, as efficient farming routes and smart gear progression can significantly improve long-term character growth. The hybrid tank mapper trades partial movement speed for massive survivability, delivering consistent clear speeds in Profound zones while outlining a clear transition path toward an energy shield (ES) endgame variant. Every gear choice, atlas passive setup, and slate modifier priority is covered, alongside critical quality-of-life settings that improve channeled skill gameplay for casual and efficient farmers alike.

Current Build Performance & Defensive Balancing
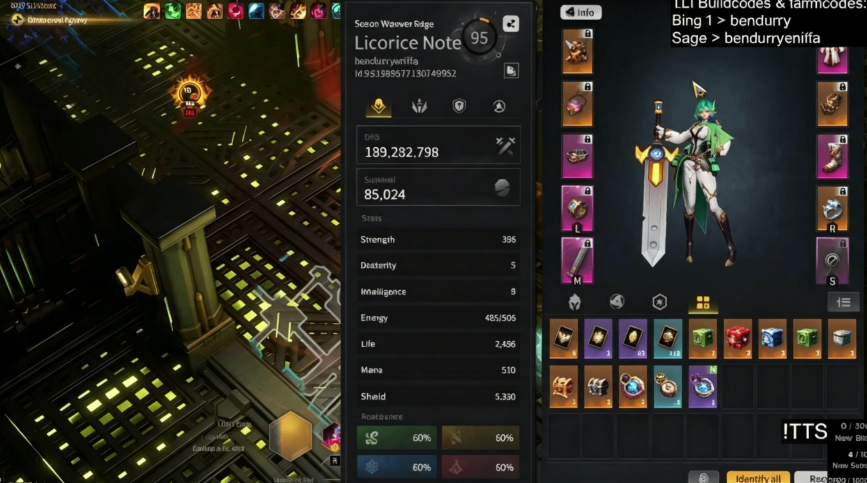
After roughly 10k currency invested into early gear, the Sage Whirlwind setup sits between 200 and 300 billion DPS, fluctuating based on Miraculous Touch proc frequency. Mapping yields around 30% higher damage output thanks to permanent momentum stacking, though several offensive stats were sacrificed to boost tankiness for safer farming runs.
Defensive layers include capped 60% all elemental resistances, 5,000 to 6,000 energy shield pool, and robust recovery from the Retreat mechanic. With Steadfast flask active alongside Fearless War Cry buffs, the build reaches 45,000 armor, translating to 65% physical damage reduction and 40% non-physical damage mitigation.
Survivability comes at the cost of movement speed; the speed flask was swapped for Steadfast to unlock heavy armor scaling, resulting in slower map clears until key mobility elixirs can be purchased. Current hourly farming output hovers between 800 and 1,000 currency units in Tamak zones, jumping to 900–1,200 in Profound areas with denser monster packs and more valuable rare drops.
Core Affliction Mechanic Breakdown
The build’s entire damage foundation relies on carefully tuned affliction stacking, enabled by a unique helmet base that converts standard afflict damage-over-time into direct hit fire damage. This powerful modifier creates a mandatory balancing act between affliction effect strength and affliction generation per second.
Higher afflict effect values reduce the rate affliction stacks on enemies. Without supplementary slate modifiers granting +30 affliction per second, stacks will rapidly decay below 100, slashing overall DPS to negligible levels. Players must roll slates for two key stats: raw affliction generation and increased affliction effect magnitude to maintain a stable 100 stack threshold on all targets.
Secondary slate modifiers that lower enemy all resistances at max affliction stacks act as vital damage multipliers, making them top priority when crafting or trading slates for the build. Auto-channel is a mandatory setting for this channeled Whirlwind skill, eliminating the need to hold the skill button continuously and simplifying consistent affliction application across packs.
Profound Farming Atlas & League Strategy
A streamlined God of War hunting atlas tree serves as the primary farming rotation, focused on resonance winding keys and rare monster node allocations. Orange rare monsters drop 20–30 currency units each, while purple variants grant 10–15 units, creating steady passive income during mapping.
Void monster nodes remain inaccessible for consistent clear speeds with the current mid-tier gear, so the atlas prioritizes rare spawn bonuses and minus-four map attempt modifiers for consistent farming runs. God of War compass items are viable for single-map runs but too costly for repeated spamming with the current currency stockpile.
The full farming loop follows a repeatable sequence: activate all resonance buffs, trigger the league mechanic, clear all monster packs, prioritize chest spawns, and move directly to the zone boss before resetting. With faster movement gear upgrades later, the same rotation can push hourly earnings up to 1,500–2,000 currency units.
Planned Gear Upgrades & ES Transition Roadmap
Three high-priority endgame items are targeted next to fix mobility and boost overall power: Cruelty Lone Walkers, Omni Elixir Belt, and Scorpion Elixir. Once these three pieces are acquired, a full energy shield transition will replace the current life-based setup.
The ES variant requires two core armor pieces: ES chest and ES boots, paired with a crafted ES ring for extra shield pool and resist coverage. This swap unlocks an additional 50 aura stack capacity and allows 225 life-based scaling while maintaining strong damage output, though the 4,000 life pool makes the early ES setup slightly squishy before full crafting.
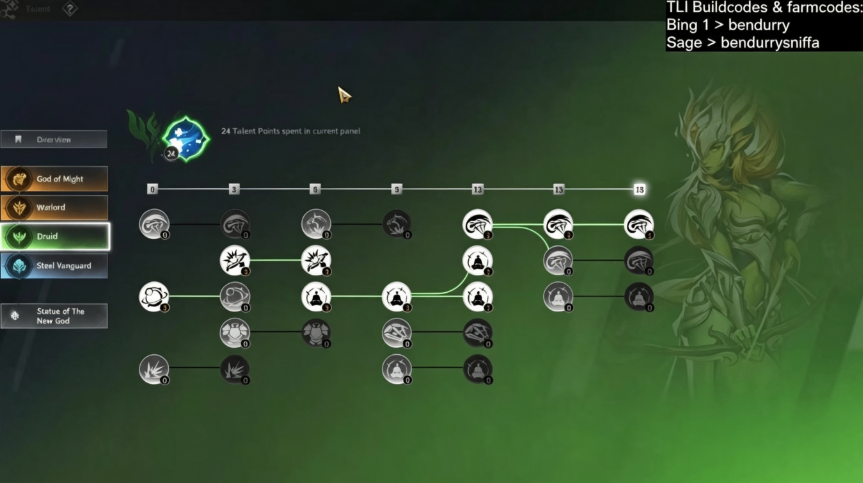
A Gale ES belt acts as the linchpin of the revised defensive build, obtainable for roughly 1,000 currency units on trade markets. Ideal rolls include maximum energy shield, strength bonuses, and full resistance coverage, while unlocking access to the Druid passive tree for drastically improved shield recovery. Druid passives grant reduced recovery intervals and extra shield regen scaled by missing ES, solving the energy shield’s inherent sustain weakness compared to life-based builds.
Minor damage upgrades include a Death Touch weapon base with flat damage modifiers, adding 15–20% total DPS for a minimal 300 currency investment. High-cost +2 all skill bases are non-optimal despite synergy with Nether King’s Divinity, and players can skip them to allocate currency toward essential defensive gear first.
Multiple Build Variants & Playstyle Tradeoffs
Three distinct build codes exist for different progression stages, each with clear pros and cons. The initial life-focused variant prioritizes raw Onslaught damage for early mapping, while the second hybrid setup trades minor offensive power for extra tankiness via Fearless War Cry.
The final refined Gale Belt variant represents the long-term core build, balancing 6,000 stable ES, high armor mitigation, and consistent affliction burst damage. It sacrifices peak single-target DPS for reliable survivability against Profound sky-based high-damage monster effects, the primary lethal threat in current endgame zones.
While the build can farm all core league content, it struggles against elite one-shot mechanics without full flask uptime and proper affliction stacking. Players are advised to complete the atlas tree fully before pushing higher-difficulty Profound layers to avoid frequent deaths and lost farming time.
Closing Outlook
This F2P Sage Whirlwind tank build delivers an accessible, low-investment endgame mapper for Season 20 players, blending reliable sustained damage with forgiving defensive layers for casual farming. The affliction stacking system rewards intentional slate crafting and atlas planning, while the clear ES transition path gives players a defined long-term gear goal. With the upcoming mobility elixir upgrades, clear speeds will drastically improve, unlocking higher currency per hour yields without sacrificing the build’s signature tank-centric playstyle. Players looking to accelerate their progression or complete key gear upgrades more quickly may also choose to buy Torchlight: Infinite Flame Elementium to support their endgame farming goals and prepare for tougher Season 20 content.