Summary
Learn how to breach enemy FOBs in WARDOGS with IEDs, C4, and RPGs. This guide explains explosive damage, vulnerable structures, efficient loadouts, WARDOGS Dollar, and practical raid strategies.
WARDOGS FOB Raiding: Understanding Your Early Explosives
Breaking into a heavily fortified FOB in WARDOGS does not always require expensive equipment or a large squad. With the right combination of explosives and a little patience, even a lightly equipped player can create serious problems for an enemy team. Early in progression, three important tools become available: the IED, C4, and RPG launcher.
The IED is available immediately, while C4 becomes available around Support Level 2 and the RPG at Support Level 5. This means players can start experimenting with FOB raids relatively early. Each explosive has a different role, so understanding their strengths is more important than simply carrying as many explosives as possible.
IED vs. C4: Which Explosive Should You Use?
The IED is surprisingly powerful despite being an early-game option. You place it directly on a surface or object and then use your phone to activate it. The activation animation takes some time, but the resulting explosion is extremely destructive.
The main limitation is that you can only use one IED at a time. However, its raw damage makes it particularly useful against important structures, especially enemy FOBs and defensive equipment.
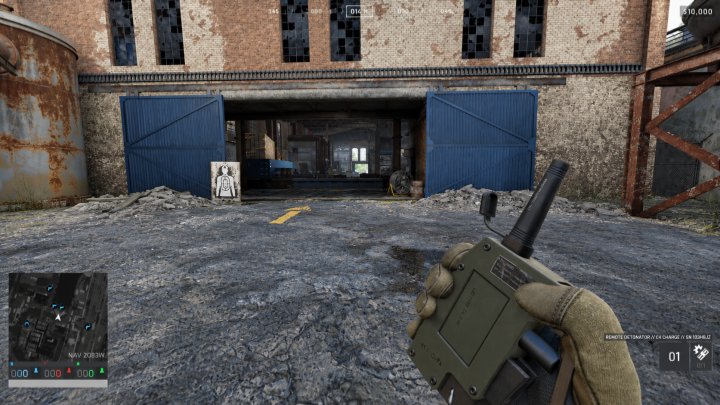
C4, meanwhile, offers much more flexibility. Multiple C4 charges can be placed before using the detonator, allowing players to control exactly how much explosive power they need. C4 also detonates immediately after activating the detonator, making it useful in close-quarters situations.
For most raids, carrying both is an effective approach. Use C4 for doors and smaller defensive obstacles, while saving the IED for high-value structures.
Know the Weak Points of Enemy Fortifications
Not every defensive structure in WARDOGS requires the same amount of explosive power. Understanding these differences can save valuable equipment during a raid.
Small Hesco walls are relatively weak. A single C4 charge removes roughly half of their health, meaning two C4 charges can destroy one. The explosion also affects nearby Hesco blocks, allowing players to create openings through several pieces of cover.
Large Hesco walls are significantly tougher. They require around four C4 charges to destroy, but strategically placing multiple charges can open a hole several blocks wide. This makes concentrated C4 placement extremely important when attacking larger defensive lines.
The tall concrete Brema walls are even harder to breach. They can require around seven C4 hits, making them poor targets for a conventional explosive assault. When possible, attackers should search for gaps, doors, gates, or other vulnerabilities instead of wasting large quantities of explosives on these structures.
Doors and Gates Are the Best Entry Points
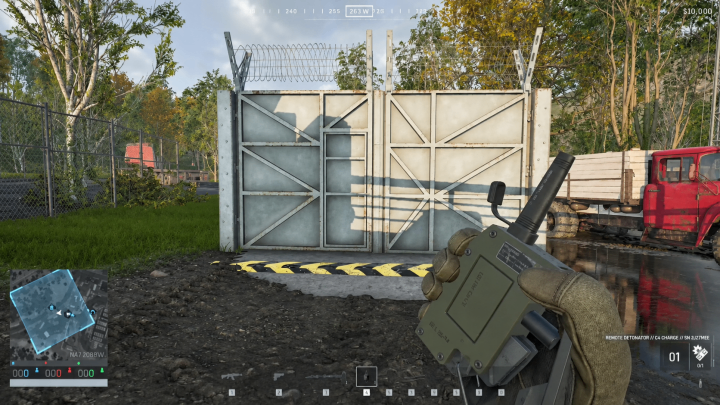
Doors are among the weakest defensive structures in a fortified base. A single C4 can destroy a standard door, creating an immediate entrance with minimal resource investment.
Large vehicle gates are similarly vulnerable. One C4 can remove a gate panel, while two charges can destroy the complete gate. This makes gates excellent targets when an enemy has heavily fortified the surrounding walls.
There is another useful detail: repairing the gate foundation does not automatically restore the destroyed doors. In practice, the enemy may need to dismantle and rebuild the structure before the entrance becomes functional again.
Barbed wire and sandbags are also easy targets. A single strategically placed C4 can destroy multiple nearby obstacles, clearing the path to a door without requiring several separate explosions.
Don't Ignore Defensive Buildables
Some structures inside an FOB are valuable targets once you successfully breach the perimeter.
The Hedgehog anti-tank obstacle is extremely durable and can take around six C4 charges to remove. Because these obstacles can also be used to block roads, destroying them may require a significant investment of explosives.
Bunkers generally require around four C4 charges to remove one front section. Placing the charges toward the center is important because the explosion can damage multiple Hesco components simultaneously.
Once inside the base, several important systems can also be destroyed with approximately three C4 charges. Mortars, for example, take roughly three charges, while the Talon anti-air system is much more vulnerable and can reportedly be destroyed with only one C4.
This creates an important tactical choice: sometimes destroying an internal weapon or support system is more valuable than simply damaging the walls.
RPGs Are Better for Distance Than Wall Breaching
The RPG provides another method of entering enemy bases, but its role is somewhat different.
RPGs have a large blast radius and can damage defensive structures, but their reload time makes them inefficient against heavily fortified walls. Destroying even small Hesco walls can require several rockets, so spending ammunition this way is generally inefficient.
The RPG becomes much more interesting when targeting doors. A single rocket can destroy a door from a distance, allowing you to create an entrance without standing directly next to the enemy's defenses.
RPG explosions can also affect multiple doors in a corridor. If an enemy uses an airlock-style design with two doors separated by a short hallway, one RPG blast may destroy both. This makes the weapon surprisingly useful against certain base layouts.
Destroying the Enemy FOB Should Be a Priority
One of the most important lessons from FOB raids is the difference between hacking and destroying the FOB.
Hacking an enemy FOB can create temporary disruption, but if the defending team remains nearby, they can potentially recover control. Destroying the FOB is much more disruptive because the enemy must obtain a replacement from their main base and transport it back to the battlefield.
This is where the IED becomes particularly valuable. While destroying an FOB with C4 can require several charges, an IED can reportedly destroy it instantly.
That makes the IED an excellent high-value raid tool. Instead of wasting it on ordinary walls, save it for an FOB, Talon, or another strategically important structure whenever possible.
Creative Vehicle Breach Strategies
Players can also combine explosives with vehicles to attack from unexpected angles. One strategy involves placing C4 on a vehicle, driving toward an enemy entrance, jumping out before reaching the fortification, and detonating the charge remotely.
The inexpensive Bobcat quad bike can technically serve this purpose, although its handling can make the tactic difficult to execute consistently. A Humvee may provide another option because it can survive more punishment and potentially continue moving after the initial explosion.
These strategies are especially useful when an enemy expects attackers to approach on foot. However, they require careful timing and can easily fail if the vehicle becomes stuck, flips, or attracts attention too early.
Build a Cheap Raid Loadout
A major advantage of this approach is that a useful FOB-raiding kit does not need to be expensive. A lightweight setup can include basic armor, a helmet, a vest, a pistol, a C4 detonator, one IED, and several C4 charges.
A loadout costing less than $3,000 can potentially cause substantial disruption if the player successfully reaches an enemy base unnoticed.
The key is not to fight everyone inside the FOB. Stealth and positioning are often more valuable than firepower. Look for gaps in Brema walls, poorly monitored entrances, unused doors, and defensive blind spots. Once inside, prioritize high-value structures instead of wasting explosives on random fortifications.
Final Tips for Successful WARDOGS Raids
Successful FOB attacks in WARDOGS are primarily about understanding structural weaknesses and choosing the right explosive for each target.
Use C4 for doors, gates, barbed wire, sandbags, and selected internal structures. Use the IED for high-value targets such as FOBs and powerful defensive equipment. Keep the RPG for ranged door breaches and situations where approaching the wall directly is too dangerous.
Most importantly, do not automatically attack the strongest part of a base. Tall concrete walls may consume huge amounts of ammunition, cheap WARDOGS Dollar, while a nearby door or construction gap could provide a much cheaper route inside.
With careful scouting, a compact explosive loadout, and a little creativity, even a solo player can disrupt a heavily defended FOB and force the enemy team to spend time rebuilding what was destroyed.