Summary
New players jumping into Sand Raiders Of Sophie often fail their initial runs due to weak trampler designs, poor settings, messy loadouts, and uninformed looting habits. This complete pre-raid walkthrough covers critical blueprint crafting, optimized game settings, inventory prep, looting priorities, and early tech tree goals. Every tip is built around a fresh starting account, so all strategies require only base starting resources and zero endgame unlocks to pull off consistent extraction, valuable early-game loot, and efficient SAND: Raiders of Sophie Crown management.
1. Sell Spare Loot To Unlock Core Tier 1 Tech
The default Grumpy Walker trampler blueprints are functionally useless for new players. Their reactor sits exposed on all sides, meaning nearly any enemy shot will destroy your vehicle and lose all carried supplies. To craft a viable starter ship, you first need to liquidate most starting inventory for crowns.
Keep only untradeable keys and essential healing supplies. All rusty guns, excess ammo, and spare crafting materials can be sold to the vendor. The crowns earned unlock vital tier 1 tech nodes: wooden decks, framed cargo platforms, and a small armament workshop.
A key rule applies to tech progress: unlocks only stay active within your current region. Switching zones resets your entire tech tree, so avoid region jumps before securing your foundational trampler components.
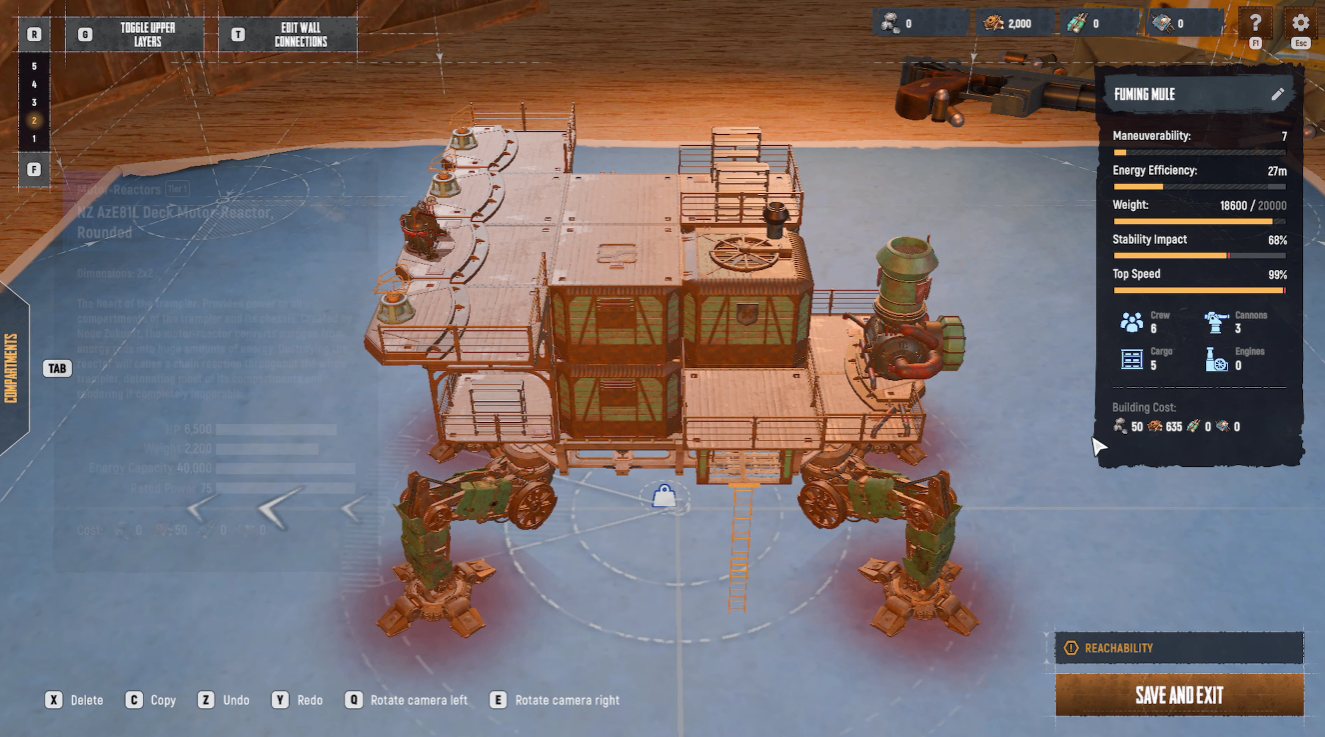
2. Craft The Fuming Mule Starter Trampler Blueprint
The Fuming Mule build is the optimal solo trampler for first raids, built entirely from unlocked tier 1 compartments. Start construction by placing the tier one motor reactor toward the rear of the chassis, surrounded by dual two-person crew cabins to block incoming fire.
Align cabin fan outlets to a single side; entry points only open opposite fan panels. Copy and stack multiple cabin units on the second floor to cover the reactor’s full vertical hitbox, eliminating easy shot angles for opponents. Add an armament workshop next to the crew quarters. This compartment boasts 2500 health and creates a buffer between attackers and your ship’s critical reactor core.
Secure the captain’s cabin behind layered doors. The small black capture terminal inside lets enemy players hijack your trampler if left unguarded—losing all loot and respawn access if seized. L-shaped framed cargo decks line the front for easy offloading without climbing ladders.
For safe boarding, attach a standard entrance platform capped with railed SNH balcony decking. This stops opponents from leaping onto your ship from the ladder side. Mount three combat turrets plus a central steering frame on the forward deck, and fill rear space with organized utility cargo bays for quick supply sorting.
3. Optimize Game Settings For Visibility & Smooth Combat
Tweak graphics, audio and control options before launching any raid to remove unnecessary visual clutter and boost target visibility. Use borderless 1080p 16:9 resolution with a capped frame rate matching your monitor refresh limit.
Disable anti-aliasing, super resolution and all secondary visual sliders, lowering most graphics values to very low. Max out render distance to spot distant enemy tramplers, and activate the bright color filter to improve visibility in dark zones.
For audio, set master volume to 28, SFX volume to 76, and mute background music and ambient noise to hear incoming gunfire and AI patrols. Use push-to-talk voice chat. On controls, switch weapon handling mode to Ola to eliminate clunky default hipfire mechanics. A mouse DPI of 800 paired with 0.35 sensitivity delivers balanced aiming for new users.
4. Prep Raid Loadout & Trampler Cargo
For solo Storm Dive raids, equip a revolver for zombie headshots and a shotgun to repel boarding enemies. Stock two stacks of revolver ammo and one stack of shotgun shells, alongside five energy rods for reactor boosts and multiple food rations. Food cuts respawn timers from one minute to just ten seconds if you get eliminated.
Stock the trampler’s forward cargo bays with one 80mm long-range cannon and two rusted 40mm turrets, plus separate ammo stacks for each weapon. The armament workshop holds repair kits and extra firearms for emergency swaps. Distribute food across every compartment so broken sections do not eliminate all respawn supplies at once.
Select Storm Dive mode for higher-value loot, and lock the match to solo only to avoid fighting three or six-person squads that overwhelm starter tramplers.
5. In-Raid Looting & Combat Fundamentals
After spawning, load all turret and handheld weapons immediately, then insert energy rods into the reactor to extend fuel runtime. Prioritize visiting nearby forts first; these POIs contain rare experimental items, alloy steel for tech tree upgrades, and storage room keys.
Three ship varieties spawn across the map: civilian boats drop only food and crafting materials, regular vessels carry basic ammo, and military ships hold cannons and rare gear. Destroy radar-triggered AI mini-tramplers for alloy steel, a mandatory resource for mid-tier tech unlocks.
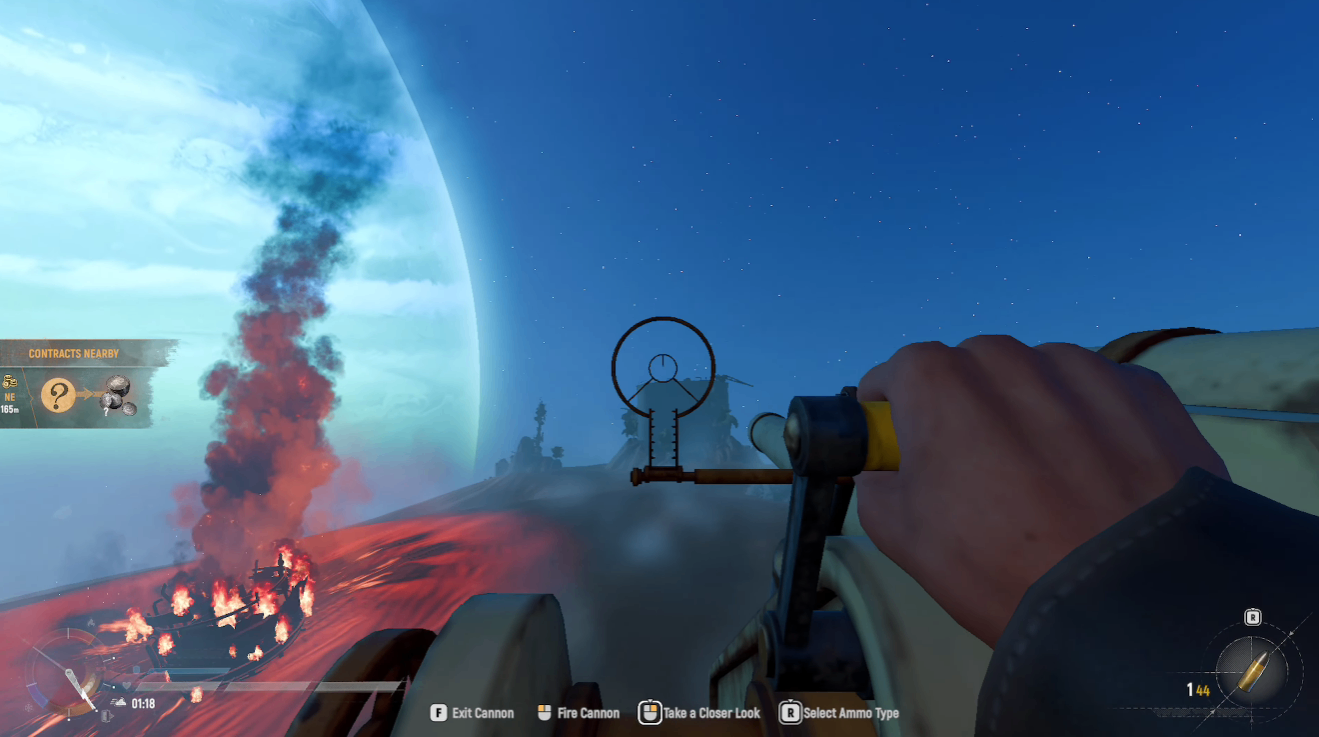
When facing enemy tramplers, always rotate your chassis to face threats head-on—your reactor has no side or rear defensive coverage. Alternate 40mm turret fire to avoid overheat locks, and use the 80mm cannon for long-distance reactor shots. If your compartments sustain heavy damage, deploy protective dome consumables or retreat to repair with dedicated kits.
Watch the storm timer constantly in Storm Dive mode. The closing storm deals fatal damage to players and unprotected tramplers, so plan extraction well before the circle shrinks fully. Any loot boxes you want to retain must be secured on trampler cargo decks before exiting the match.
6. Early-Game Tech Tree Priority Roadmap
After accumulating alloy steel and crowns from initial raids, follow a clear unlock order for faster progression. Prioritize upgraded medium chassis and two-story motor reactors to boost trampler health and weight capacity. Next unlock reinforced framed cargo bays and high-health armament compartments for improved frontline defense.
Progress toward battering rams and enclosed tier 3 steering frames for safer PvP encounters. Save tier 4 royal chassis and enclosed artillery bays for late-game play, as their heavy resource costs are out of reach for fresh accounts. Craft worn and pristine cannons once your cargo capacity supports extra ammo stockpiles, and keep a steady supply of C4 for breaching fort entryways and enemy ship doors.
Final Thoughts
Success in your first Sand Raiders Of Sophie raid hinges entirely on pre-raid preparation rather than raw combat skill. A properly built Fuming Mule trampler, optimized visibility settings, well-stocked cargo, and focused fort looting let new players extract consistent crowns and rare tech materials without fighting large coordinated crews. Stick to solo Storm Dive runs while learning core mechanics, and follow the outlined tech tree progression to upgrade your ship gradually as each successful raid adds critical crafting supplies. Players who want to accelerate their early progression, upgrade their trampler faster, and prepare for more challenging raids can also choose to buy SAND: Raiders of Sophie Crown to secure additional resources and improve their overall adventure experience.